
Looking to expand your orchid collection? You’re not alone. Lots of orchid owners find that after they get the hang of taking care of one or two orchids, they’re itching to have more! If you find yourself in this situation, you could always buy more orchids or you could try propagating the orchids you already own instead.
Propagating orchids does take longer than heading to the store and browsing until a new orchid catches your eye, but propagating can be very rewarding. (Plus, it’s usually cheaper than buying new orchids.)
There are several ways to propagate orchids depending on the type. The most common methods for propagation are growing orchids from cuttings, growing orchids from keikis, or creating new orchids from division.
We’ll focus just on growing orchids from cuttings in this article, but if you want to learn about other methods of orchid propagation, check out 5 Ways to Grow a New Orchid for more information.
Let’s get started.
Steps to Growing Orchids From Cuttings
Most plant lovers are probably familiar with taking cuttings of their favorite plants to create new plants. Surprisingly, when it comes to orchids, taking cuttings is not the most frequently used propagation method. There’s a good reason: although cuttings are among the easiest ways to propagate plants, many types of orchids won’t successfully grow from cuttings.
The good news is that phalaenopsis and other single-stem orchids can be propagated from cuttings. Some dendrobium orchids or other multi-stem orchids, like dendrobium nobile, will sprout from cuttings as well. Unfortunately, most multiple-stem orchids will not grow from cuttings.
Also, vining orchids are super easy to propagate from cuttings. However, vining orchids are not as popular among orchid lovers as some other orchid types as they are difficult to keep alive. It’s too bad because with vining orchids, you just cut a little of the vine and the cutting will root easily. Keeping it growing indoors long enough to take a cutting in the first place is the tricky part. We won’t discuss how to propagate vining orchids in this article because they are not commonly kept as houseplants.
Even though not all orchids can be grown from cuttings, if you have an orchid that will propagate from a cutting, you’re in luck. In my opinion, growing orchids from cuttings is the easiest method of propagation.
Keep reading to find out what to do to successfully grow orchids from cuttings.
1. Select an Orchid Cutting
Once you’ve determined that you can propagate your orchid from cuttings, then it’s time to select the stem you want to propagate. Naturally, you’ll want to start with a healthy orchid to give your new orchid the best chance of survival.
If you are propagating a single-stem orchid (also known as a monopodial orchid) like phalaenopsis, you will be basically cutting the orchid stem in half. Leaving the bottom half with the roots still attached in the original container, you’ll grow the new orchid from the top half. The bottom half will continue to grow even after the top half is removed. If everything goes well, you’ll end up with a second orchid identical to the first.
If you are taking a cutting from a multi-stem orchid (also known as a sympodial orchid) like dendrobium nobile, you’ll cut one cane from the orchid and then divide the cane into several cuttings. Each cutting should contain 2 to 3 nodes. Remember that not all sympodial orchids will propagate from cuttings, so check that yours can before taking cuttings. It’s not a huge deal if you try to take cuttings from a sympodial orchid that won’t propagate this way. You probably won’t harm the orchid, but you also won’t get any results!
Wait until your orchid has finished blooming and the flowers have started to fade before taking cuttings. You want the orchid to be done putting its energy toward blooming before you start the propagation process.
2. Make an Orchid Cutting
Before you begin taking an orchid cutting, make sure all your supplies are ready to go.
Here’s what you’ll need.
- Sharp, clean scissors
- A new container
- Sphagnum moss or orchid potting mix
- Clear plastic bag
It’s very important to use sterile equipment when taking cuttings because using unclean equipment can introduce bacteria that can harm your orchid. A quick and easy way to disinfect your scissors is to use rubbing alcohol to wipe off the blades and then run clean water over them.
This takes a few extra seconds but will help ensure you get a healthy new orchid from your cutting.
Some growers choose to dip the cut ends in cinnamon or charcoal. These natural antifungal agents can help prevent your cuttings from developing bacterial or fungal infections, however, this step isn’t absolutely necessary. As long as you keep your tools clean, your orchid cuttings shouldn’t have a problem in the first place.
3. Root an Orchid Cutting
To root your orchid cutting, you’ll just need sphagnum moss or orchid potting mix. Don’t try to use regular potting soil because it will be too dense for the new orchid.
You can buy commercial rooting hormones to help encourage new root growth, but this product is optional. Although rooting hormones can help plants root faster, orchid cuttings can root on their own without it. Whether you decide to use rooting hormones or not depends on how patient (or impatient!) you are.
How Long for Orchid Cutting to Grow Roots?
Waiting for orchid cuttings to grow roots requires patience. If the propagation is successful, you will see root growth, but it’s not uncommon for some orchid cuttings to take 3 or 4 months before showing signs of growth.
Propagating orchid cuttings may not be a quick process, but it is exciting when your patience finally pays off and you see roots beginning to develop.
Once the roots reach about 3 inches long, you can feel assured that the propagation is going well even if you aren’t seeing as much growth in other areas. Orchids need well-developed roots to become healthy, mature plants.
Propagate Orchid Cutting in Potting Soil
Generally, orchid cuttings are propagated in orchid potting soil or sphagnum moss. The most common growing mediums for healthy, mature orchids, you can choose either one for propagating a new orchid. However, I’d advise sticking with the same growing medium you use for mature orchids because it’ll be easier to use the medium you’re familiar with.
Step 1: Select the stem to propagate.
Following the instructions above, choose the stem you want to use for your cutting. Remember that for single-stem orchids like phalaenopsis, you’ll cut the orchid in half, leaving the bottom part with roots in the original container. For multi-stem orchids like dendrobium nobile, you’ll cut just one cane near the base and then cut the cane into multiple cuttings that each have 2 to 3 nodes. You’ll only get one new orchid from single-stem orchid cuttings, but you can potentially get multiple orchids from multi-stem orchid cuttings.
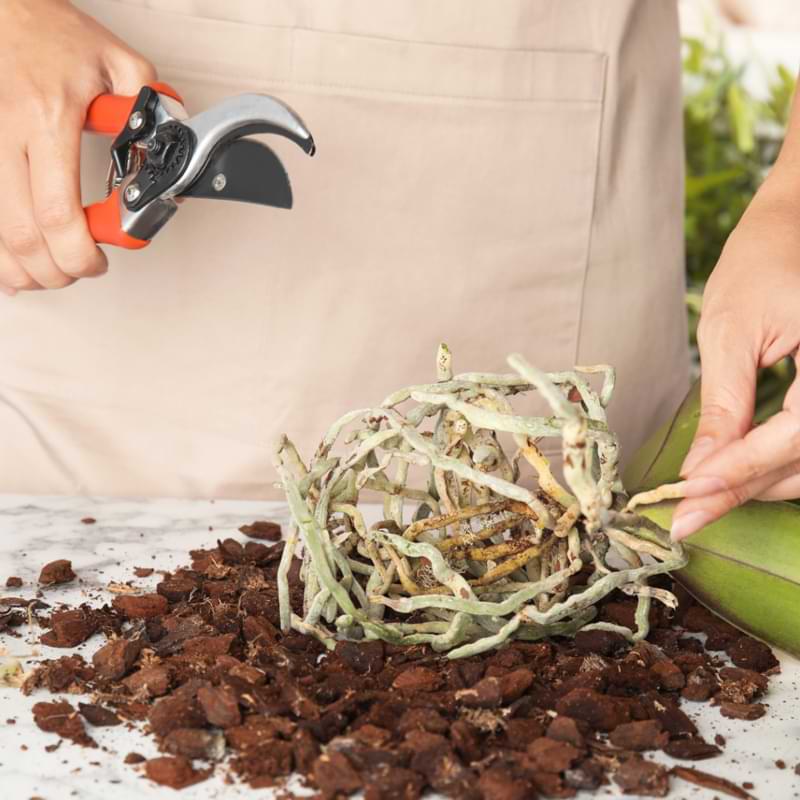
Step 2: Make the cut.
Use sharp, sterilized scissors when you’re ready to take your cuttings. You want to avoid introducing bacteria to the orchid, so it’s a good idea to make sure your working area is clean as well.
Infection is the biggest danger for your orchid during this method of propagation, but as long as everything is clean, there shouldn’t be any problems.
Step 3: Place the stems in the new growing medium.
If using orchid potting mix as your growing medium, place the bottom cut end directly into the soil. You may need to place a popsicle stick or similar object in the soil next to the cutting to help it stay upright.
If using sphagnum moss as your growing medium, wrap the moss around the bottom cut end. You may need to use a string or strips of pantyhose to gently secure the moss in place. Cuttings wrapped in sphagnum moss do not have to sit upright before their roots begin developing.
Next, water the cuttings. Don’t completely saturate the growing medium, but be sure to provide enough moisture to make the growing medium damp. Once you’ve done this, cover the cutting with a clear plastic bag to help keep the moisture in.

Step 4: Care for the cutting.
Place the cutting in a sunny location with lots of indirect light. Just like with mature orchids, direct light can be too strong for the cuttings, so keep them warm at 75 to 85 degrees Fahrenheit. You may need to use a seedling heat mat to keep the cuttings at a good temperature.
Remove the plastic bag and water to replace lost moisture as necessary. You should eventually see root growth on the cuttings. If sphagnum moss is your growing medium, you can periodically unwrap the cuttings to check on the progress. If orchid potting soil is your growing medium, it’s better not to remove the cuttings from the potting soil to check for progress.
It’s possible that not all cuttings will develop into new orchids. If you notice signs of rot on any of your cuttings, discard those cuttings.
Once you notice new growth on your orchid cutting, you can move it to a different container if you’d like. Then care for the new orchid just like you care for mature orchids. Remember that the care you provide will differ slightly depending on the type of orchid.
To help your new orchid thrive, you can begin fertilizing once the roots have developed. Use a gentle, diluted fertilizer like Premium Orchid Food weekly to encourage your orchid to grow. Continute to be patient, though, because even with fertilization, you will probably have to wait a while until your new orchid finally flowers.
Final Thoughts: Growing Orchids From Cuttings
Propagation can seem intimidating, but propagating orchids from cuttings is not too difficult. It mostly just requires patience and a little attention.
Focus on having a clean environment when taking the cuttings and on providing the right amount of moisture and light to encourage the cuttings to root. As long as these conditions are correct, you have a good chance of producing new orchids from cuttings.
Growing orchids from cuttings is the easiest method of propagation, but it’s not the only way to grow new orchids. Some types of orchids require other propagation methods. If you can’t propagate your orchid through cuttings, check out our article Orchid Propagation Made Easy: 5 Ways to Grow a New Orchid to find the method that works best for your orchid.
There’s nothing quite as exciting as watching for new flowers to open on orchids that you propagated yourself!
Join Our Orchid Care Facebook Community
In our Facebook group of orchid lovers, we’re dedicated to creating a rich and engaging environment where plant lovers can come together and share tips, tricks, and experiences.
If you’re an orchid lover, come join our Facebook community! We can’t wait to celebrate your successes and help you troubleshoot your care routine.
For continued success, you can explore our other articles or visit our online shop for plant care products that are sure to keep your plants boasting rich green leaves and big, bountiful blooms year-round.