Orchid propagating can feel complicated, but once you know these 5 easy ways to grow new orchids, you’ll be propagating your plant in no time.
Epiphytic plants have unique root systems and specific care requirements that can be intimidating to new growers, which can make the thought of propagating your orchid overwhelming.
But propagating your orchid isn’t as complex as you might think.
Once you know a little bit about the different types of orchid species, how they grow, and the best ways to propagate them indoors, you’ll be able to easily propagate your orchid and multiply your plant collection in no time.
Let’s dive into the 5 ways to propagate your orchid so you can get started growing new orchid plants today.
What’s the best way to propagate my orchid?
Before you choose the best way to propagate your orchid, you’ll want to know if your orchid is a monopodial species or a sympodial species. Let’s take a closer look at the difference between the two along with some common examples of each.
Monopodial orchids
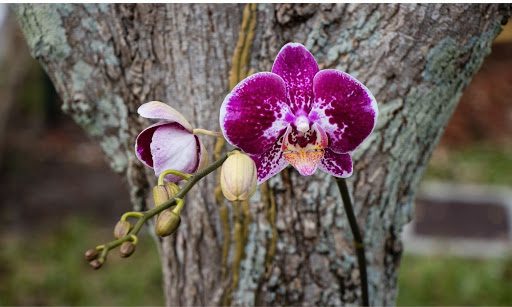
The term monopodial means “single foot,” which indicates that the orchid has one tall vertical stem with an aerial root system. Monopodial orchids usually bend into the classic orchid arch when they’re in bloom since the weight of full flowers causes the stem to droop.
Phalaenopsis, vanda, and Angraecum are popular examples of monopodial orchids.
Sympodial orchids
Sympodial orchids, on the other hand, grow along a horizontal stem called a rhizome. From the rhizome, the orchid grows both roots and pseudobulbs. Sympodial orchids can draw water from their pseudobulbs in drought conditions, so they don’t have to be watered as frequently as monopodial orchids.
Cattleya, oncidium, dendrobium, and cymbidium are popular examples of sympodial orchids.
Orchid Propagation Technique #1: Rhizome Division
If you have a sympodial orchid with multiple stems, it’s a good sign that your plant can be divided into several smaller plants. Carefully inspect your orchid’s horizontal rhizome structure to find the best areas to make cuts, and be sure to include about three mature pseudobulbs per section.
To get started, choose a natural node or impression along your orchid’s rhizome. Then make a clean cut, gently separate the new orchid from the old one, and place the new orchid into a pot with well-draining soil.
Professional Tip: When dividing your orchid, use a sterile pair of sharp shears to ensure you don’t introduce any bacteria or germs to your plant while dividing it.
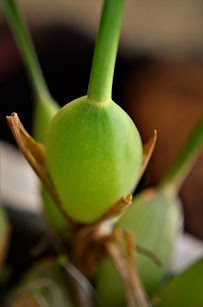
Orchid Propagation Technique #2: Back Bulb Division
Back bulbs are pseudobulbs that contain reserves of water but aren’t producing roots or flowers. To separate back bulbs from your plant, isolate a bulb and use a pair of sharp shears to separate it from the primary plant.
Once the bulb is removed, pot it in well-draining soil, and water it to induce sprouting. Some back bulbs may sprout quickly while others are slower to take root.
Professional Tip: Back bulb propagating is a slow process, so be patient. It can take some back bulbs years to sprout roots and stems and grow into a full, flowering orchid plant.

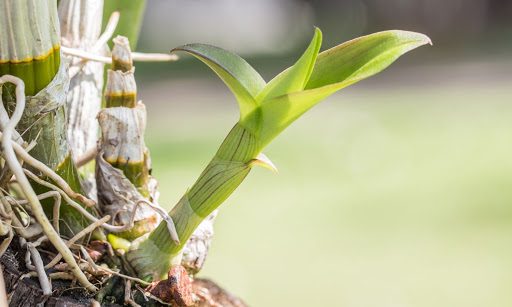
Orchid Propagation Technique #3: Repotting a Keiki
If you have a monopodial orchid, keep an eye out for small offshoots that develop along the nodes of the primary stem. The small offshoots that grow from the mother plant are called keikis, and they can easily be separated and repotted to form a brand-new plant.
To remove a keiki, carefully take hold of the new plant and use a pair of sharp shears to sever the baby plant from its mother. After you make the cut, put the keiki in a new pot with well-draining soil and be sure not to overwater it.
Professional Tip: Wait for the keiki to sprout leaves and roots before removing it from the mother plant. If you remove the keiki before it develops healthy leaves and roots, it won’t be able to sustain itself in a new pot.
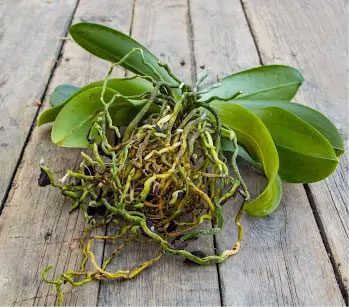
Orchid Propagation Technique #4: Trimming and Potting Aerial Roots
Aerial roots often grow off of the main stem of monopodial orchids. They’re fairly easy to identify since they can typically be found dangling from nodes along the primary vertical stem.
Interestingly, you can trim aerial roots from your plant and put them in a pot to sprout new growth. It takes some time, but eventually the roots will grow a brand-new orchid plant.
Professional Tip: Before the aerial root cuttings have sprouted stems, be sure to keep them in a humid environment with plenty of indirect sunlight. Use a humidity tray and position the pot in a bright south-facing room to encourage new growth.
Orchid Propagation Technique #5: Stem Cuttings
Stem cutting is a propagation technique that’s applicable to both monopodial and sympodial plants, though it’s easiest with sympodial orchids.
Once new stems grow to be about a foot in length, they’re ready to be cut and repotted. For best results, wait until the new stem has gone through at least one flowering season before removing it from the main orchid.
After removing the stem, place the cutting in moss, wrap the pot in a transparent plastic bag, and place it in a warm spot with bright light. In three to four months, your cutting may show new growth, especially from the nodes along the stem.
Professional Tip: As your stem cutting takes root, it’s important not to overwater your plant. New roots are especially delicate and are susceptible to root rot. A good rule of thumb is to wait until the potting mix is thoroughly dry before watering.

Use Houseplant Resource Center’s Premium Orchid Food
When propagating your orchid, you’ll want to be sure to use a gentle, specialized fertilizer to encourage your new plant to take root, grow tall, and burst into bloom when flowering season rolls around.
Houseplant Resource Center’s Premium Orchid Food is formulated to help your orchids—no matter how small—grow lush green leaves and bountiful, exotic blooms.
Premium Orchid Food is the perfect product to help your newly propagated orchids thrive because:
- It’s easy to apply: The pre-mixed spray acts as a root stimulator for plants to improve their ability to use nutrients. This is especially important for young plants.
- It’s specially formulated: Sea kelp extract and humic acids address the unique needs of your orchid. With regular use, you’ll see healthy and vibrant orchids that grow larger year after year.
- It’s natural and gentle: The standard orchid fertilizer ratio is diluted, so it’s safe to use at every watering without burning your orchid’s roots.
- It works with many orchid varieties: Premium Orchid Food is compatible with many indoor varieties, including phalaenopsis, epidendrum, Miltonia, cattleya, vanda, cymbidium, and oncidium.
For best results, simply use Premium Orchid Food every time you water. Then sit back and watch your new orchid’s blooms explode.