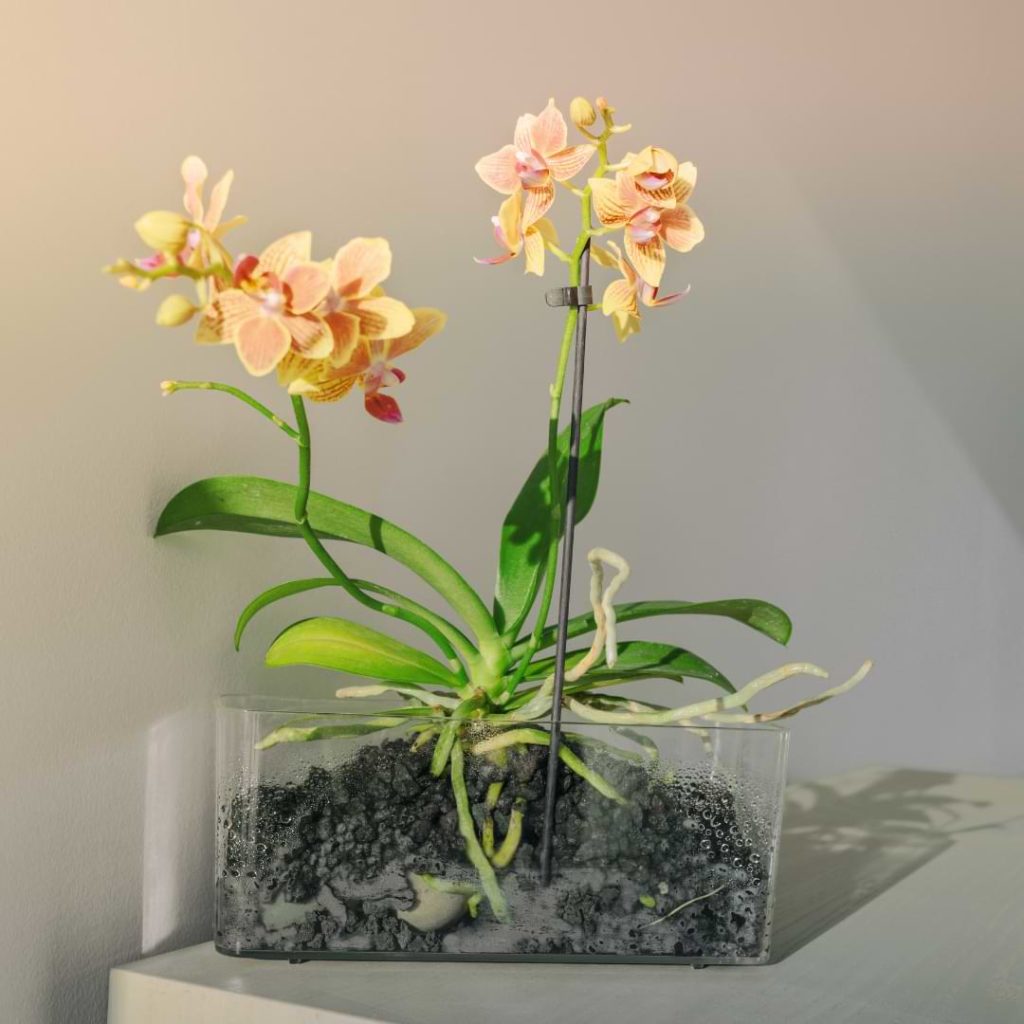
For most plants, seeing roots growing out of the potting soil and in the air instead would be a cause for alarm. For some types of orchids, though, this behavior is perfectly normal.
Air roots help keep your orchid healthy and allow the plant to have access to the air and nutrients that it needs to thrive. Trying to repot an orchid with air roots may seem intimidating, but the process is not much more complicated than repotting an orchid without air roots.
Keep reading to find out more about why orchids have air roots and how to care for orchids with air roots. Although seeing an orchid with air roots for the first time may be startling, by the time that you finish learning more about them, you’ll appreciate how these unique features help orchids thrive.
What Are Orchid Air Roots?
You’ve probably noticed that most of your orchid’s roots grow downward into their growing medium. However, you’ve likely also noticed that a few of the roots seem to grow above the growing medium instead. These air roots, also called aerial roots, are pretty typical for orchids.
Phalaenopsis and other epiphyte orchids do not grow in the ground in their natural habitat. Instead, these orchids attach themselves to tree branches. Their roots absorb nutrients and moisture from the air.
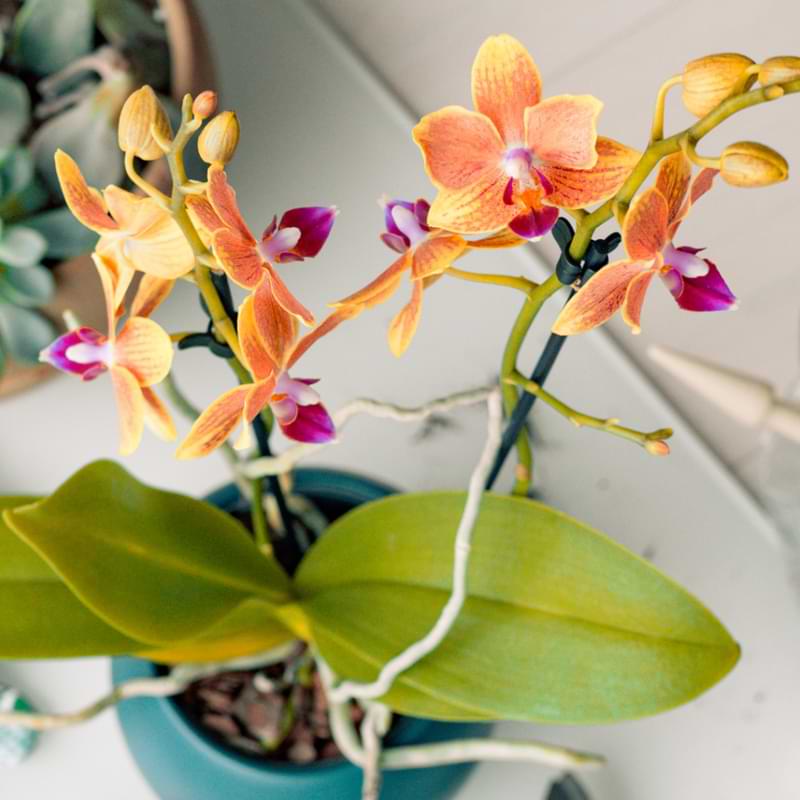
So, seeing a few air roots on your orchid is normal. As long as the air roots are firm and white, then they are healthy.
Orchid Roots Growing Out of Pot
If the number of air roots increases, it may be a sign that your orchid needs to be repotted. If the roots that are in the growing medium are having a hard time absorbing nutrients, then the plant may send out more aerial roots.
Check the roots in the pot before deciding to repot. Also, take into consideration how long it has been since the last time that you repotted the orchid. Seeing extra orchid roots growing out of the container is not always a sign that your orchid needs to be repotted.
When to Repot an Orchid
Orchids need to be repotted on a regular basis. This is because the growing material in their containers breaks down over time. Because most orchids don’t grow in soil in their natural environment, they cannot handle the changes as the particles in the growing medium become smaller and tightly packed.
You should plan to repot your orchids every one to two years even if everything seems fine. However, you should repot sooner if you notice that your orchid’s container has become too small, the growing medium has broken down more quickly than expected, or your orchid’s roots are becoming pot-bound.
If possible, wait until your orchid’s blooming cycle has ended before repotting. This should allow your orchid to recover from repotting more quickly.
How to Repot an Orchid With Air Roots
Repotting an orchid with air roots isn’t that much different from repotting other orchids. Here’s what you need to do.
- Carefully remove the orchid from its pot. If your orchid is particularly large, then you can tip the container on its side and gently slide it out. Otherwise, you can turn the entire container upside down.
- Remove the old potting medium from the container, and gently shake your orchid’s roots to remove old potting soil that is clinging to them.
- Soak the roots in lukewarm water for about 10-15 minutes. Try to keep water off the crown during this time, but if you do get water on it, you can always wipe it off with a towel.
- Trim away any roots that are soft, dried-out, or brown. Leave the healthy green roots alone, though.
- Place the orchid in its new pot. Hold the orchid in the center and carefully place the new potting medium around the roots. Keep the air roots out of the new soil. It’s okay if one or two of them end up covered, though. It can be difficult to remember which roots were aerial roots after soaking them.
- Because you have soaked the roots, you can wait about a week before watering your orchid.
Trimming Orchid Air Roots
Some people do not like the appearance of orchid air roots and want to trim them; however, air roots have an important role in an orchid’s survival. Air roots draw nutrients and moisture from the air and are beneficial for the orchid. Trimming healthy air roots can be detrimental for the orchid.
You should only trim orchid air roots that are clearly dead. Air roots tend to look more dried-out than you might expect, so just because an air root looks a little dry, this does not mean that the root is dead. If you mist an air root that looks dry, it will perk up a bit, but you do not need to constantly mist the roots. It’s fine for air roots to be more dry than roots in the potting medium.
If you are certain that an air root is dead, then you can trim it; otherwise, just let the roots be. If the appearance of aerial roots really bothers you, you can slip your orchid container into a slightly larger container and encourage the air roots to hang out of sight between the two containers.
Soaking Orchid Air Roots Before Repotting
You should soak orchid air roots in lukewarm water for 10-15 minutes before repotting just like you would with other roots. Soaking the roots helps to remove residue and leftover old growing medium, so it is an important step in repotting. Because the roots only soak for 15 minutes at the most, sitting in water for a little while does not hurt the air roots.
After soaking the roots, you may realize that it is much harder to tell the difference between the air roots and the roots that were in soil. Try your best to keep the two types of roots separated while soaking them.
If you get mixed up and place a few aerial roots into the soil by accident when you repot, your orchid will still likely be okay. Young aerial roots sometimes adapt to live in the growing medium. Older aerial roots will usually die when covered by growing medium, but as long as your orchid has enough other healthy roots, this should not cause a huge problem.
Pot Size
Although the pot that you use for your orchid may not seem like as big a deal as using the correct soil or giving your orchid the proper amount of water, the pot that you choose does play a role in helping your orchid thrive.
A pot that is too small will make it difficult for the orchid’s roots to develop properly and stunt the growth of the orchid. On the other hand, a pot that is too large will hold too much growing medium and prevent your orchid’s root from getting enough light and air.
The best thing to do to ensure that your orchid is in the correct size pot is to select a slightly bigger pot for your orchid each time you repot. Measure the size of the pot that your orchid is currently in so that you can select a new one that is just a little bit larger.
The majority of orchids require pots that are between 4-6 inches. Of course, as orchids mature, some older specimens may require even larger pots. There are a few types of orchids that start off larger, but they will come in larger pots when you buy them to begin with.
Soil Type
As we talked about earlier, many orchids are epiphyte orchids that grow along tree branches rather than growing in the soil. If your orchid has air roots, then it is an epiphyte orchid. Since these orchids do not grow in the ground in the wild, they have very particular needs when it comes to soil.
Most orchids need soil that allows their roots to access both light and air, so the soil cannot be dense. The soil also needs to drain well because orchids do not want their roots to sit in water for long periods of time.
You cannot use regular potting soil for orchids. This type of soil is too dense and will basically suffocate your orchid’s roots. Instead, you either need to choose a commercial growing medium designed for orchids or make your own.
A good commercial growing mix for orchids will normally include tree bark, organic matter, and moss. If you decide to make your own growing medium, a popular mix is to use 5 parts tree bark to 1 part perlite or sphagnum moss.
It is important to repot your orchid every one to two years because the growing medium will break down over time. When the growing medium breaks down, the pieces become too small and compact. This cuts off your orchid’s roots from the proper amount of air and light.
Starting with a good growing medium for your orchids is essential, but it is also necessary to make sure that you change out the growing medium before it breaks down too much.
Roots Inside or Outside of the Soil
Air roots may look unusual, but as long as they are healthy, then they are helping your orchid by accessing moisture and nutrients.
In the wild, epiphyte orchids have air roots rather than roots that go into the soil. Despite their unusual looks, orchid roots growing outside the soil are often healthier than those growing in the soil because this is what orchid roots are designed to do.
Air roots can help your orchid survive if the roots below the soil die due to root rot. If your orchid gets root rot but you’ve removed all the air roots, then your orchid will probably not make it.
You can cover the air roots on your orchid with an extremely thin layer of sphagnum moss. This will help prevent them from drying out because your home probably is not as humid as their native tropical environment. Do not try to cover air roots with soil, though; most of them will not survive the change to being covered by soil and will die instead.
Caring for Damaged Orchid Aerial Roots
Aerial roots are important for your orchid’s health, but there is no reason to panic over minor damage to aerial roots. Because air roots are exposed, they sometimes get broken. Use sterilized scissors to make a clean break if needed. Then you can either apply 3% hydrogen peroxide to the open area or allow it to air dry on its own.
After this, continue caring for the orchid as normal. Don’t move it, change its watering schedule, or apply extra fertilizer. The orchid might experience a little bit of stress from losing an aerial root, but it will recover. Orchids naturally lose some of their air roots in their native environment, and an orchid will grow more aerial roots to replace the damaged ones when needed.
Try to avoid the actions that caused the damage in the future, but don’t get too worried over the occasional break.
Join Our Orchid Care Facebook Community
In our Facebook group of orchid lovers, we’re dedicated to creating a rich and engaging environment where plant lovers can come together and share tips, tricks, and experiences.
If you’re an orchid lover, come join our Facebook community! We can’t wait to celebrate your successes and help you troubleshoot your care routine.
For continued success, you can explore our other articles or visit our online shop for plant care products that are sure to keep your plants boasting rich green leaves and big, bountiful blooms year-round.