Orchids have a reputation for being finicky houseplants. While somewhat picky, orchids do give clear signals when something is wrong. One of the easy signals to notice is wrinkled orchid leaves.
No one wants to see wrinkled leaves on their orchids. Not only are wrinkled leaves less attractive than an orchid’s shiny, firm leaves, but wrinkled leaves are also a visible sign an orchid is not healthy.
Wrinkled leaves indicate that something is wrong with your orchid’s care or environment. However, it’s possible to revive an orchid with wrinkled leaves as long as you identify the problem and fix it. Most of the issues that cause wrinkled leaves are easy to solve.
Keep reading to find out what causes wrinkled leaves and how to fix them.

What Do Healthy Orchid Leaves Look Like?
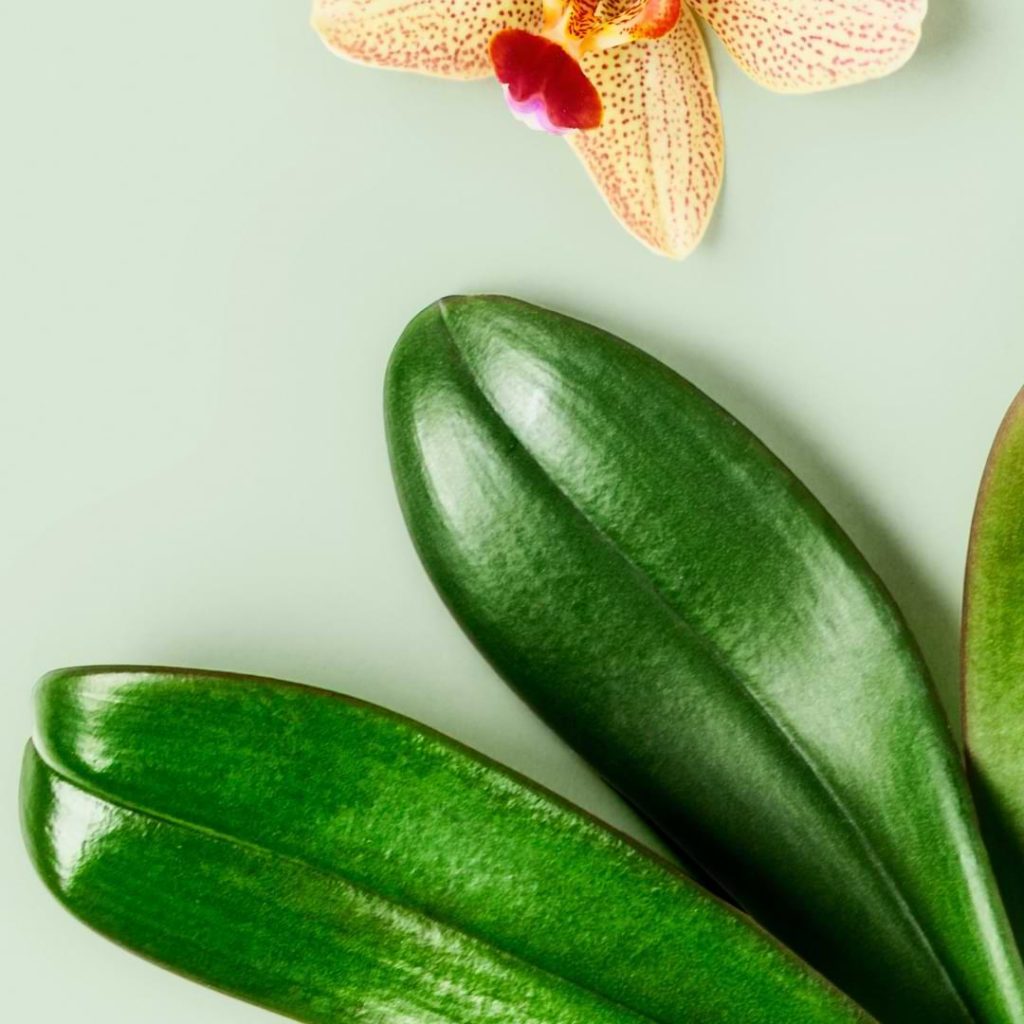
Although everyone talks about orchid blooms, an orchid’s leaves are also very attractive. They make the orchid look interesting even when it isn’t in bloom. Healthy orchid leaves are firm and rubbery and will usually have a deep-green color and fairly shiny appearance.
Wrinkled orchid leaves look the opposite of healthy leaves: limp, discolored, and dull. If you touch the wrinkled leaves, they won’t have that slightly elastic feel that a healthy leaf has.
Why Are My Orchid’s Leaves Wrinkled?
Wrinkled orchid leaves aren’t a sign that you should give up on your orchid. Instead, wrinkled leaves alert you that something is wrong. If you notice the problem soon enough, you will most likely be able to fix the issue.
For the most part, wrinkled leaves are a sign of issues with care. Sometimes wrinkled leaves are the result of a bacteria infection, but the most common issues are related to water, sunlight, and nutrients. With a little observation, you should be able to figure out exactly what is wrong with your orchid and make changes that allow the orchid to recover.
Overwatering
The first area that might be a problem is watering. If your orchid’s leaves are limp, check the root system to figure out whether overwatering or underwatering is an issue. Beginning houseplant owners usually assume that wrinkled leaves are due to not having enough water, but it’s more common for beginners to overwater instead. Too much water can be just as detrimental for your plant as too little water.
If the roots look brown, mushy, or rotted, you’re likely overwatering your orchid. When orchid roots are constantly soaked in water for too long, they begin to suffocate; the damaged roots cannot efficiently transport water and nutrients to the rest of the plant, resulting in wrinkled leaves.
Allow the orchid’s growing medium to dry out before providing more water. You’ll also probably need to use sterilized scissors to remove rotten roots and treat with a root supplement. As long as your orchid still has enough healthy roots left, its leaves have a good chance of recovering.
Check that your orchid’s container has adequate drainage holes. Excess water cannot escape if there are no drainage holes or if the holes are blocked. Sometimes orchids are sold in pots that do not have drainage holes, which greatly increases the risk of overwatering.
Underwatering
Underwatering can also cause wrinkled leaves. Generally, leaves that are wrinkled due to underwatering feel leathery, but it’s a good idea to check the roots to confirm the problem. Roots that aren’t getting enough water look dry, brittle, or shriveled.
These roots also aren’t able to get enough water or nutrients to the rest of the plant, mainly because there isn’t any water to transport it.
To revive an underwatered orchid, try bottom watering the orchid. Fill a tray with an inch of water, place the orchid in the tray, and allow it to soak for 20 minutes before removing. This will help the roots to rehydrate and allow the growing medium to soak up as much water as possible. Keep a regular watering schedule. Don’t overcompensate by watering excessively, though—you don’t want to replace one watering problem with another!
Provided that enough healthy roots still remain, an underwatered orchid will recover in time with proper watering.
Too Much Heat
Even though most orchids are native to tropical environments, it’s possible for them to suffer from too much heat. Depending on the type of orchid you have, your orchid may prefer a max temperature of anywhere from 80 to 90 degrees Fahrenheit.
Heat levels that consistently rise above this preferred max temperature can cause stress to your plant, resulting in wrinkled leaves. Evaporation causes the orchid leaves to lose water too quickly and the plant becomes dehydrated.
Usually excess heat occurs during the summer when plants are placed outdoors. However, it’s also possible for orchids to get too much heat during the winter if they are placed near a fireplace or heating vent.
Direct Sunlight
Different types of orchids need different amounts of sunlight, but regardless of how much sunlight an orchid needs, direct sun can burn their leaves. When an orchid leaf burns, the chlorophyll in the leaf breaks down; as a result, you’ll notice red, purple, yellow, or brown spots on the burned leaves.
You can’t get rid of these damaged spots once they occur. However, if you notice signs of leaf burn, you can move the orchid out of direct sunlight to prevent more burns from occurring. Many orchid owners use a sheer curtain to allow orchids to get enough sunlight while being shielded from the harshest rays.

Nutrient Deficiency
Lack of nutrients is another issue that can cause wrinkled orchid leaves. Usually this lack of nutrients occurs because the roots are damaged and unable to transport nutrients to the rest of the plant. Sometimes, though, the problem is that the soil no longer contains enough nutrients. Orchids only have access to a small amount of growing medium, and over time, the nutrients in the growing medium are depleted due to use and/or leaching from watering.
This is why it’s important to fertilize your orchid regularly. When selecting a fertilizer, look for one with a balanced NPK ratio, like 20-20-20. I prefer to use liquid fertilizer because I find it easier to control. Use a gentle fertilizer like Premium Orchid Food to provide nutrients each time you water.
Small amounts of fertilizer are good for your orchid, but be careful of adding too much fertilizer, which can damage the roots and hurt your orchid’s overall health. Either buy a fertilizer formula that is diluted or dilute the fertilizer yourself.
Damaged Roots
You’ve probably noticed that some of the potential problems that cause wrinkled orchid leaves involve damaged roots. When the roots are not able to transport nutrients and water properly, the rest of the plant suffers.
Overwatering and underwatering are the most common reasons why roots get damaged; however, it’s also possible to damage the roots when transplanting or repotting an orchid. You shouldn’t be too worried when repotting an orchid because the roots usually recover from minor damage on their own, but do make sure that you are gentle anytime you remove an orchid from its container.
When you repot an orchid, you should remove any dead or rotten roots with sterilized scissors or other tools. Work carefully to ensure you don’t accidentally harm the healthy roots while you work.
Damaged roots can also be caused by fungal or bacterial infections. Orchids are most vulnerable to new bacteria when they are being repotted, so it’s important to keep your materials clean.
Infections aren’t too common, but if fungus or bacteria is a problem, you’ll need to treat the infection and repot the orchid with clean soil.
Will Wrinkled Orchid Leaves Recover?
Wrinkled orchid leaves can usually recover as long as you catch the problem in time. Even when wrinkled, the leaves are hopefully still helping provide energy for the plant. Damaged leaves may not look appealing, but a plant with no leaves does not have a high chance of survival.
Do not remove wrinkled leaves unless you are absolutely certain that the leaf is dead or unless the leaf needs to be removed to avoid spreading disease or fungus. Ideally, the wrinkled leaves will recover and regain their former healthy appearance over time after you correct the problem. Even if an individual leaf dies, as long as the rest of the orchid recovers, new leaves will eventually begin to grow.
Some orchids are hardier than others and will bounce back from problems quickly. Other orchids take their time, and you might not notice a change for the better at first. Try to be patient.
Fixing Wrinkled Orchid Leaves
In most cases, you can make adjustments that will help your wrinkled orchid leaves recover. Usually you just need to change some aspect of the care you’re providing and then give your orchid enough time to recover. Just make sure you don’t overcorrect and end up causing another problem instead.
Three simple solutions fix the majority of problems that lead to wrinkled orchid leaves.
Follow a Good Watering Schedule
Incorrect watering is one of the most common causes of unhealthy orchids (both overwatering and underwatering can both lead to wrinkled orchid leaves). It’s also one of the easiest problems to fix and prevent from happening again.
The watering frequency depends on the orchid and the environment. In general, plan to water your orchid about once every 7-10 days. Some orchid species do best when their growing medium dries out completely between waterings; other species need to be watered right before their growing medium dries out. Find out which type your orchid is and monitor the growing medium so you know when the orchid needs a drink. During warmer months, you’ll water more frequently than during cooler months.
In general, orchids suffer more from overwatering than underwatering. If you aren’t certain whether to water yet, wait one more day.
When you water, be sure to allow the growing medium to soak up as much water as it will hold. The orchid’s container needs to have drainage holes so that excess water can drain easily.
I prefer to bottom water my plants because it helps me water the right amount. Bottom watering is when you fill a tray or container with water and place your plant in the tray (being sure that the water is able to reach the drainage holes in the bottom of your plant’s container). Allow the plant to soak for about 20 minutes, then remove the plant and allow the excess water to drain away. I find that bottom watering helps dry growing medium absorb water better.
You can also water plants from the top. To do this, you run water over the plant’s growing medium until water drains freely from the bottom of the container. Just like with bottom watering, be sure to allow excess water to drain away. This method is faster than bottom watering, and it prevents the buildup of excess salts and minerals.
Choose whichever watering method you are most likely to stick with. Regardless of the way you choose to water your orchids, the right frequency is essential.
Change Your Potting Mix
Changing the potting mix can help restore orchids with wrinkled leaves. As the growing medium breaks down over time, it becomes so dense that it holds on to too much water. This could contribute to an overwatering problem or it could damage the roots; both of these will keep the orchid from recovering.
We recommend that you use a potting mix that is designed for orchids. These plants do not grow in the same type of soil that most houseplants require. Instead, they grow best in a lightweight potting mix that allows for air circulation and adequate drainage. The best potting mix for orchids is quite different from what we typically think of as “soil.” Most orchid potting mixes will contain moss and/or tree bark along with a few other ingredients. You can purchase a commercial orchid potting mix or make your own.
Changing out the potting mix can also help if your orchid is suffering from a fungal or bacterial infection, problems which usually develop in the soil. And regularly repotting your orchids with fresh potting mix will help prevent issues from occurring in the future. Orchids are typically repotted every 1-2 years.
Position Plant With Indirect Sunlight
Because orchids are tropical plants, you might assume that bright sunlight is essential for orchids to thrive. This isn’t completely true. Many species of orchids do like exposure to lots of sunlight, but other orchids prefer less light. For all orchids, however, the sunlight should mostly be indirect.
Avoid placing orchids in positions where they will get direct sunlight, especially during the hottest portion of the day. If needed, use sheer curtains to shield your orchid from the harshest sun rays.
Most orchids do best when placed in a window that faces north or east. During the winter, when sunlight is less intense, some orchids will be fine getting direct sunlight.
If you live in a climate where you can keep your orchids outside during part or all of the year, be sure to place them in a location that gets morning light or afternoon light rather than direct sunlight during the middle of the day.
Join Our Orchid Care Facebook Community
In our Facebook group of orchid lovers, we’re dedicated to creating a rich and engaging environment where plant lovers can come together and share tips, tricks, and experiences.
If you’re an orchid lover, come join our Facebook community! We can’t wait to celebrate your successes and help you troubleshoot your care routine.
For continued success, you can explore our other articles or visit our online shop for plant care products that are sure to keep your plants boasting rich green leaves and big, bountiful blooms year-round.


