We take the guesswork out of growing orchids with this step-by-step beginner’s guide to orchid care.
Orchid care for beginners may be intimidating. Orchids are popularly known as fussy plants, and many people say they’re difficult to care for.
But, just like other plants, orchids only need a few simple conditions to thrive. With the right water, sunlight, growing mix, and fertilizer, your orchid will live a long, healthy life and produce iconic blooms for years to come.
If you’re new to growing orchids and not sure where to start, follow this step-by-step guide to master the basics of orchid care.
Below, we cover how to care for your orchid in 10 steps. We’ll walk you through everything from choosing the right orchid type for your home garden to pruning your orchid when the time is right.
By following this guide, you’ll learn the unique needs of your orchid, and you’ll discover that orchid care isn’t so intimidating after all.
Orchid Care for Beginners Step #1: Choose an orchid.
To beginner orchid growers, this step might seem too obvious to mention. But seasoned professionals know how important it is to know what kind of orchid you’re buying before you buy it.
With a little research, you can choose an orchid that’s amenable to your home conditions. Once you know which orchid type is best for your home garden, you can prepare by collecting the orchid care tools you’ll need to be successful. For example, if you choose a tropical orchid, you’ll want to purchase a humidity tray to keep your orchid from drying out in your home.
Since there are many orchid types, choosing an orchid can be a bit overwhelming. But don’t let this step deter you. We’ve put together a list of 10 orchid types that are perfect for your indoor garden. Click here to see our list so you can choose the perfect orchid for your garden.
Professional Tip: Moth orchids are arguably the most popular orchid plant. You’ve likely seen them at your local grocery store or nursery. If you’re looking for a beginner’s orchid, the moth orchid is a safe bet.
Orchid Care for Beginners Step #2: Pick an orchid pot.

After you’ve chosen an orchid, you’ll want to buy a new pot for it—especially if your orchid comes in a decorative pot without drainage holes.
Generally, an orchid pot should have plenty of drainage holes, allow air to reach the orchid’s roots, and shouldn’t be too big. For more tips on how to choose the perfect pot for your new orchid, click here.
Professional Tip: Though it’s not a necessity, choosing a transparent orchid pot is beneficial. Most orchids have complex root systems that enjoy having access to sunlight and air.
Orchid Care for Beginners Step #3: Choose an orchid potting mix.
When you’re ready to pot your orchid, you’ll want to choose a potting mix that will provide optimal growing conditions for your plant.
Typically, tropical orchids are epiphytes, meaning they don’t grow in regular soil. In the wild, many tropical and subtropical orchids grow clinging to the branches of trees. If you use regular soil or a traditional potting mix for epiphytes, you’ll suffocate their roots and accidentally kill your orchid. For best results, buy an orchid potting mix for tropical orchids.
Terrestrial orchids, though, do grow in regular soil. These orchid species are usually native to the Americas. Try purchasing a terrestrial orchid growing mix for the best results.
Professional Tip: You can make your own orchid growing mix at home by combining three parts fir bark, one part perlite, and one part sphagnum moss.
Orchid Care for Beginners Step #4: Water your orchid.
Whether you choose to repot your orchid right away or to leave it in its current container, it’s important to properly water your orchid.
For new orchid growers, over-watering is perhaps the number-one misstep that leads to accidentally killing the orchid. The key to watering your orchid is to make sure it drains well and the growing mix dries between waterings. Your orchid shouldn’t sit in a damp growing mix since its root system can easily rot.

An easy way to know if your orchid needs water is to insert the tip of your finger into the growing mix to check if the mix is dry. If the mix feels damp (or if you’re not sure), then don’t water your orchid.
You can also purchase a moisture meter to easily read the moisture levels of your orchid’s growing mix.
Professional Tip: A good rule of thumb is to water your orchid no more than once a week, though different orchid types will require adjustments in watering. For most orchid types, you should reduce watering during the winter months.
Orchid Care for Beginners Step #5: Place your orchid over a humidity tray.
After you’ve potted and watered your new orchid, it’s a good idea to set it on a humidity tray. Since most orchids are tropical or subtropical varieties, they enjoy humid conditions.
As water evaporates from the humidity tray, your orchid will bask in the moist air. This helps your orchid maintain optimal water levels since moisture is lost through microscopic stomata pores along the orchid’s leaves.
Professional Tip: You can buy a commercial humidity tray for your orchid, or you can make your own with a saucer and a handful of pebbles or stones.

Orchid Care for Beginners Step #6: Place your orchid in a spot with optimal light.
Depending on your orchid type, you can choose a low-light spot or a well-lit spot for your plant.
More often than not, orchids require bright, indirect light to encourage bloom and maintain hearty roots. Place orchids that enjoy bright light in a south- or west-facing window.
Place orchids that enjoy low light conditions in an east- or north-facing window. Low-light orchids can also be positioned a few feet from the window so direct sunlight won’t reach the plant.
Professional Tip: Keep in mind that direct sunlight can easily burn your orchid. Some growers choose to put a sheer curtain between the orchid and its light source to diffuse direct sun rays.
Orchid Care for Beginners Step #7: Make sure your orchid is in a temperate spot.
Generally, the optimal temperature for an orchid is between 60-75° F (16-24° C). Though, to trigger blooms, many varieties enjoy a drop in temperature by at least 10° F at night.
You should check the temperature needs of your orchid type before making permanent adjustments.
Professional Tip: For some orchid types, moving the orchid to a cooler room at night, such as a basement, is a good idea to promote plant growth and stimulate bloom.
Orchid Care for Beginners Step #8: Prune your orchid after bloom.
If you’re new to orchid care, or new to plant care in general, pruning your orchid might feel unnatural. But pruning your plant is an important part of promoting a healthy root system, new growth, and reliable blooms.
While your orchid is blooming, cut back fading flowers. This will keep your plant neat and encourage new blooms. To cut back fading flowers, use sharp shears or clippers to make a clean, even cut directly back to the main branch.
When the orchid is done blooming, and all its flowers have faded or dropped, prune back the flower stems. To efficiently prune your orchid, trim the stem an inch from the main stalk. If there are any yellow or brown shoots on the stalk, cutting them back to the main stalk will encourage the orchid to grow a healthier new shoot.
Professional Tip: Invest in a pair of sharp shears to prune your orchid and sterilize your tools before pruning. Orchids are susceptible to disease, so using clean tools will make it easier for your orchid to recover.
Orchid Care for Beginners Step #9: Repot your orchid.

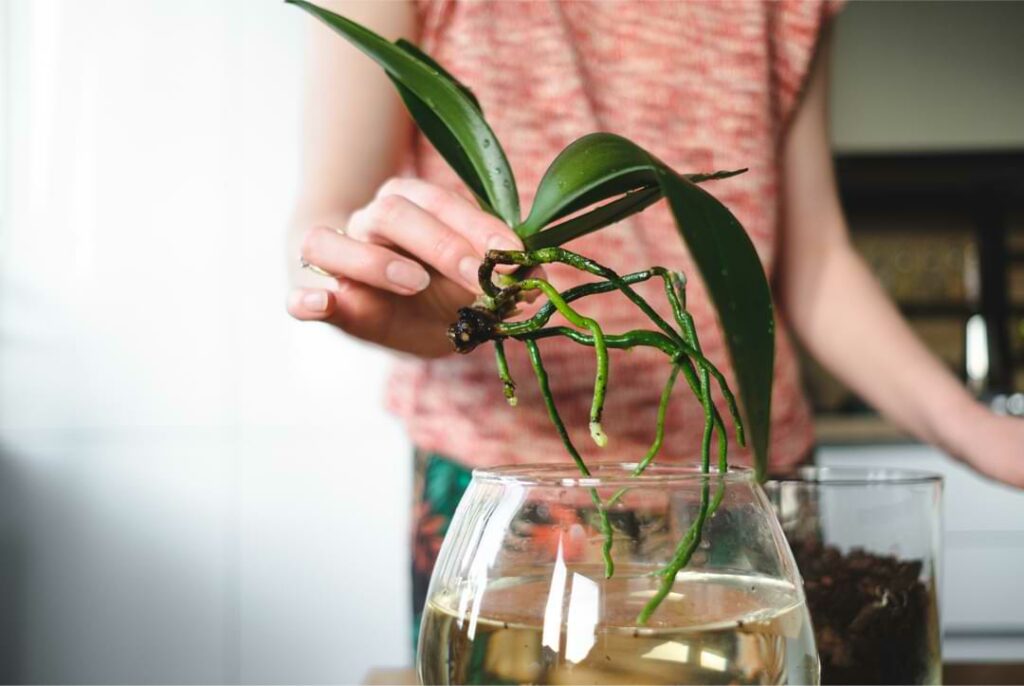
When your orchid is finished flowering and you see new growth starting to appear, it’s time to repot.
Gently remove the orchid from its pot, prune away any dead or damaged roots, and use your fingers to untangle the roots from the old growing mix. Stake your orchid so it has support in its new pot.
Professional Tip: Place your orchid in a new, slightly bigger pot each year so that it has room to grow.
Orchid Care for Beginners Step #10: Fertilize your orchid.

Whether you’re new to orchid care or a seasoned professional, you should use a reliable orchid fertilizer to nourish your plant. Orchid fertilizer will support all of your efforts to provide the best conditions for your orchid.
Specialized orchid fertilizers are different from traditional plant fertilizers. Their formulas are designed specifically for the unique needs of your orchid plant. The right orchid food will encourage healthy root growth, lush foliage, and reliable blooms.
Beware of using unreliable fertilizers, though. The wrong fertilizer ratios can easily burn the delicate inner systems of your orchid.
Professional Tip: Use our Premium Orchid Food to nourish your orchid with an easy-to-use spray formula. Simply spray the Orchid Food on your orchid’s leaves, roots, and potting mix every time you water. Then sit back and watch your plant bloom.
Click here to buy our Premium Orchid Food and start nourishing your orchid today.