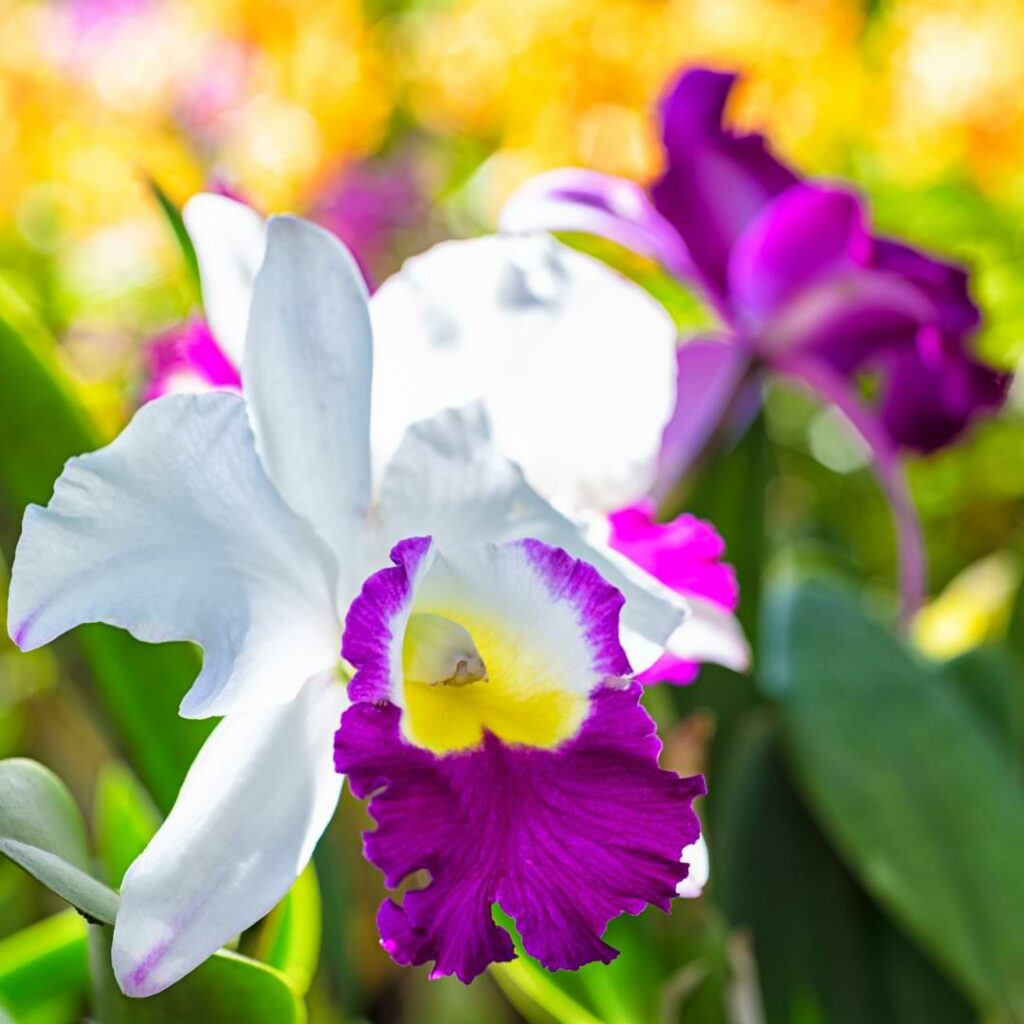
Welcome to the world of Cattleya Orchids, where beauty meets elegance. These orchids are known for their vibrant colors and delicate fragrance, making them a popular choice among gardeners and flower enthusiasts alike.
Growing these stunning epiphytic plants can be quite challenging if you don’t know what Cattleya Orchids need, but luckily, here is a guide to help you navigate the care of this beautiful flower.
Growing Cattleya Orchids
Growing this beautiful plant is fairly easy once you get the basics down. First, it’s important to know that these plants are native to more tropical climates, and they typically rely on other, taller plants. They are commonly found scaling the side of a tree, and plants like this are called Epiphytic plants.
Epiphytic Plant Needs
Cattleya orchids are epiphytic plants, which means they grow on other plants rather than in soil. As such, it’s essential to understand their unique needs to ensure they thrive.
One of these specific requirements is adequate air circulation. Epiphytes rely on wind and moving air to prevent moisture from accumulating on their leaves and roots.
As a plant that grows best on other plants, it’s a good idea to have something for your Cattleya Orchid to climb on, like a small trellis. Other than these unique requirements, care for the Cattleya doesn’t differ much from care requirements for most other orchids. Below is a comprehensive care guide, as well.
Common Problems
Like most houseplants, Cattleyas can fall victim to some common problems. These issues can range from poor growth and yellowing leaves to pests and diseases.
Pests And Diseases
Cattleya orchids are prone to a variety of pests and diseases that can cause significant damage if left untreated. The most common pests include spider mites, mealybugs, scale insects, and thrips. These tiny creatures feed on the sap from the plant’s leaves and flowers, causing them to wilt and eventually die.
To prevent these pests from infesting your orchid plants, it is essential to regularly inspect them for any signs of infestation. If you do find an infestation, you can use insecticidal soap or horticultural oil to control it. Be careful when using these products as they can be harmful if not used correctly.
Shrivelled Leaves
When the plant is not receiving enough water, its leaves will start to shrivel and collapse. On the other hand, when it’s getting too much water, root rot may occur and cause the roots to decay, which can in turn cause the leaves to shrivel.
Another factor that can lead to shrivelled leaves is inadequate humidity levels. Cattleya orchids thrive in humid environments; therefore, if they are exposed to dry air for an extended period of time, their leaves will start to dehydrate and shrink.
To prevent this issue from happening or worsening, it’s crucial to identify the underlying cause first. If it’s due to under watering or lack of humidity levels – increase watering frequency and mist regularly around the plant.
If overwatering has caused shrivelled leaves on your cattleya orchid – reduce watering frequency immediately and add some ventilation around your plants roots so they don’t stay water-soaked for long periods of time. Use a moisture meter to monitor the moisture levels in the soil to prevent overwatering from happening.
Caring For Cattleya Orchids
When you get the basics down of how to care for your Orchid, it’s fairly easy to keep up on their care needs. Below, we’ll cover everything from the growing media your orchid lives in to the right type of fertilizer to use for your Cattleya.
Growing Media
The choice of growing media is important when it comes to growing Cattleya orchids. A well-draining and aerated medium is essential for the roots to breathe and grow properly. Most growers use a mixture of bark, sphagnum moss, perlite or charcoal as their preferred mix.
Bark is the most common ingredient in most commercial potting mixes because it holds moisture well while also allowing good air circulation around the roots. Sphagnum moss helps retain moisture but should be used sparingly since it can hold too much water which can cause root rot. Perlite or charcoal can be added to provide better drainage and improve aeration in the medium. These materials help prevent soil compaction so that water flows freely through the potting mix.
It’s important to choose a medium that suits your environment as this will affect how often you need to water your plant. If you live in a dry climate, then using more sphagnum moss may be necessary compared with those living in humid areas.
Light and Position
Cattleya orchids need bright but filtered light to thrive. Direct sunlight can burn their leaves and damage the plant. The ideal location for a Cattleya orchid is near an east-facing window where it can receive morning sun, or shaded under a tree outside. If you notice your orchid not blooming as much as before, it may be due to insufficient light exposure. In this case, consider moving the plant closer to a window with more natural light or supplementing with artificial lighting.
If growing indoors, it’s important to keep the plant away from any drafts or heating/cooling vents that could cause temperature fluctuations. It’s also essential to rotate your Cattleya orchid every few weeks so that all sides of the plant get equal access to sunlight. This will help prevent lopsided growth and ensure overall healthy development.
Temperature and Humidity
Cattleya orchids are native to tropical regions, which means they require warm temperatures and high humidity levels to thrive. When it comes to temperature, these orchids prefer daytime temperatures between 70-85°F and nighttime temperatures between 55-65°F. During the winter months, make sure not to expose them to very cold drafts as this can damage the flowers.
As mentioned before, these epiphytic plants naturally grow in humid conditions, so replicating their natural environment is a must. Aim for a relative humidity level of around 50%-80%. You can increase humidity by placing a humidity tray with pebbles and water underneath the plant or using a humidifier.
If you live in an area with dry air or low humidity levels, consider growing your Cattleya orchids in a greenhouse or terrarium. This will help maintain proper moisture levels and ensure your plants stay healthy.
It’s important to note that high humidity levels combined with poor ventilation can lead to fungal diseases such as root rot. To prevent this from happening, make sure there is enough airflow around your plants while maintaining adequate humidity and soil moisture levels.
Watering
Watering your cattleya orchid is just a little different than watering other common houseplants. Since the growing media shouldn’t have very much actual soil in it, you’ll be relying on the orchid bark or the sphagnum moss to retain the moisture your plant will then use until the next time you water. It’s also still possible to overwater your orchid, especially if the plant’s growing media is not balanced properly.
When watering your cattleya orchid, ensure that you soak the roots completely until excess water drains out of the pot’s bottom holes. Avoid getting water on the leaves as this can cause fungus or bacterial problems. Do this once every seven to ten days during active growth periods and reduce the frequency to about every two weeks (or less) during dormant seasons.
Remember that every environment is different; factors such as temperature and humidity will impact how often you need to water your Cattleya orchid. So observe closely for signs of over or under-watering- brown spots on leaves may indicate over watering while wrinkled pseudobulbs are symptoms of under watered plants.

Fertilizing
Fertilizing is an essential aspect of Cattleya Orchid care that you should not ignore. When fertilizing your orchids, always
ensure that you are using a balanced fertilizer with equal amounts of nitrogen (N), phosphorus (P), and potassium (K). Avoid high-nitrogen fertilizers as they can cause excessive leaf growth at the expense of flower production.
Using a plant food specifically formulated for orchids will help your Cattleya thrive even more, so consider this option when choosing your fertilizer. Plant food is designed to be given each time you water your plant, giving it a smaller amount of nutrients more often than regular fertilizers.
It’s also crucial to flush out excess salts from the potting media every few months by watering them thoroughly with clean water. This process helps prevent salt buildup and ensures healthy root development.
Re-Potting
Repotting is an essential aspect of caring for your Cattleya orchids. It helps to refresh the growing medium and improve drainage, ensuring that your plant has enough nutrients and oxygen to thrive, and it gives you an opportunity to thoroughly inspect the roots, allowing you to fix potential issues before they harm your plant. It’s important to know that Cattleya’s, like other orchids, actually prefer to be somewhat rootbound, so repotting will not be a common thing you will need to do for your orchid.
The best time to re-pot your Cattleya orchid is after it has finished blooming, as the plant will soon enter a dormant stage and will not be shocked by being repotted. You should also repot when you see roots growing out of the pot’s bottom, even if the plant isn’t in its dormant phase yet. Additionally, you’ll know it’s time to repot your orchid if you notice that the growing medium has broken down or become too compacted.
To begin, gently remove the plant from its current pot by loosening the root ball with a prying tool. Then, carefully examine the roots and trim any dead or damaged ones with clean, sharp pruning shears before placing it in its new container.
When selecting a new pot, opt for one that is slightly larger than the previous one. Make sure it has proper drainage holes at the bottom to prevent waterlogging.
Next, fill about a third of your new container with fresh potting mix and center your plant on top of it. Gently add more soil around the roots while ensuring that all roots are fully covered but not buried too deeply beneath soil level.
Water thoroughly until excess water drains from below before returning it back into its original spot where indirect bright light will reach them daily.
Pruning
Pruning is an essential part of Cattleya orchid care, as it helps to promote new growth and maintain the plant’s health. When pruning your orchids, make sure to use clean and sharp tools to avoid damaging the plants. It’s important to sanitize your tools before pruning one plant, and in between each plant you prune to prevent diseases from spreading. Use bleach or sanitizing wipes to do this easily.
The first step in pruning is removing any dead or yellowing leaves. You should also remove any damaged or diseased parts of the plant. If you’re facing a bad pest infestation, you may also opt to prune off the affected areas and throw them out, allowing your plant to be rid of the pesky pests quickly as opposed to using other methods.
If you want your Cattleya orchids to produce more flowers, it may be necessary to prune back some of the older stems and flower spikes. This will encourage new growth and help the plant produce more blooms in future seasons.
When pruning your orchids, be careful not to cut into healthy tissue or damage any remaining buds on the stem that you plan on keeping on the plant. Take your time and work slowly and carefully, making small cuts rather than large ones.
With proper pruning techniques, you can keep your Cattleya orchids looking their best year after year. Just remember to always use clean tools and take care not to damage healthy tissue when cutting away dead or diseased parts of the plant.
Flowers
When flowering, Cattleyas require proper care and attention to ensure they reach their full potential, and the blooms stay open for as long as possible.
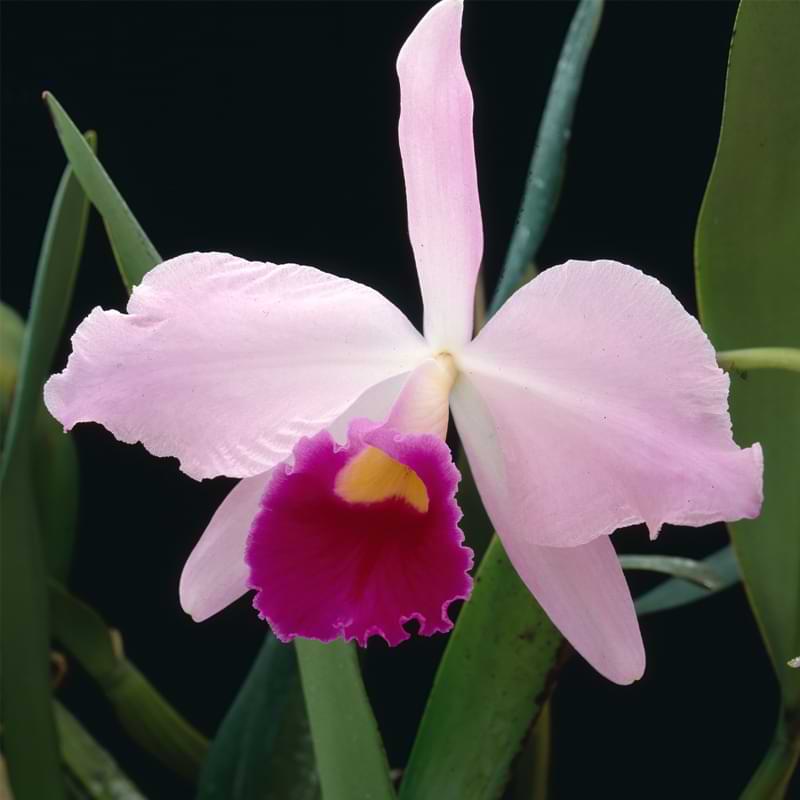
The flowers on a Cattleya orchid are simply stunning, and they can range in color, including basically every color except true blue. Cattleya’s can produce new flowers typically once per year, but some have been known to bloom up to twice per year. Proper care will help the orchid flowers more than anything, so make sure you are paying careful attention to your orchid’s care in order to get the best blooms possible.
Once the blooms fade, you will need to care for your plant a little differently.
Care After Flowering
The first thing you will want to do after your orchid’s flower has completely died back is to prune it off. Don’t prune it until the whole flower is spent. It’s tempting to cut it off as soon as you see the flower drooping, but it’s important to be patient and wait for the plant to finish putting energy into the blooms.
Removing the spent flowers and dead spikes will prevent the orchid from expending unnecessary energy on maintaining these structures.
After flowering, your orchid will enter into the dormant phase of its life cycle, so it’s important to adjust your watering schedule to match this. Reduce watering frequency to allow the growing media to dry out slightly between waterings.
In addition to adjusting your watering schedule, you can also consider fertilizing your Cattleya Orchid with a balanced fertilizer still, but you will want to cut the frequency and amount of fertilizer in half. Your orchid will not be using many nutrients during the dormancy period, but it does still need nutrients during this time in order for it to come out of dormancy well and begin its new life cycle.
It’s also important during this time period to monitor your orchid closely for any signs of pests or diseases. Catching these issues early can help prevent them from causing significant damage or spreading throughout the entire plant collection.
Propagating Cattleya Orchids
Propagating Orchids is a great way to expand your collection or share your passion with others. There are two main methods of propagation: division and backbulb propagation.
Division involves separating the plant into smaller sections, each with at least four pseudobulbs and some roots attached. This is the preferred method of propagation, as it’s more likely to be successful. Only propagate by division when the plant is not flowering. Try to do this during the root growth phase of the orchid’s life cycle, this will help prevent shock and give your newly propagated plant the best chance at survival.
Backbulb propagation involves removing the older bulbs from the base of the plant and planting them separately. This is fairly simple to do, but this method is less likely to take root. Find a back bulb that is likely to be viable by looking for one with an active “eye” on the bulb. You may need to cut off the back bulb using a knife or pruning shears, but once you have the bulb, you simply plant it in its own plant media and watch it carefully for new roots.
Join Our Orchid Care Facebook Community
In our Facebook group of orchid lovers, we’re dedicated to creating a rich and engaging environment where plant lovers can come together and share tips, tricks, and experiences.
If you’re an orchid lover, come join our Facebook community! We can’t wait to celebrate your successes and help you troubleshoot your care routine.
For continued success, you can explore our other articles or visit our online shop for plant care products that are sure to keep your plants boasting rich green leaves and big, bountiful blooms year-round.