Phalaenopsis orchids (also known as moth orchids) are among the most popular orchids kept as houseplants. They are readily available in many stores that carry plants and commonly given as gifts. With the proper care, you can enjoy watching your phalaenopsis orchid bloom for years, but to keep it thriving, you must repot it on a regular basis.
Orchids have a reputation for being fussy and difficult to care for, but that isn’t the case with many common phalaenopsis orchids, which are relatively easy to take care of at home. The same is true when it comes to repotting them. Repotting may sound difficult, but for phalaenopsis, the process is mostly easy and straightforward.
You just need to be aware of a few key things before you repot your phalaenopsis. Once you know what to do, you shouldn’t have any trouble repotting your phalaenopsis when necessary.
Keep reading to find out how and when to repot phalaenopsis orchids.
What Is a Monopodial Orchid?
Phalaenopsis are monopodial orchids, which means they have one stem with one root system. In fact, monopodial orchids are sometimes referred to as single-stem orchids. This one stem is where a monopodial orchid develops all its leaves and flowers.
Monopodial orchids are easy to repot because you just place the plant in the center of the container. Repotting orchids with more than one stem and one root system can be a little bit tricker to place in a container. Since phalaenopsis are monopodial, you don’t have to put a lot of thought into centering the orchid “just so” when you repot it.
Repotting Phalaenopsis Orchids
Repotting your phalaenopsis orchid is necessary from time to time. The process is fairly easy, so there’s no reason to be nervous about repotting. Repotting regularly will help keep your orchid happy and thriving, but there are just a few things to keep in mind when it’s time to repot.
When to Repot a Phalaenopsis Orchid
Letting your orchid go too long without repotting can create problems, but repotting too often can stress your orchid. So, how do you know when it’s time to repot your phalaenopsis orchid?
The general rule is to repot your phalaenopsis orchid once every two years. However, you might not remember the last time that you repotted or you might run into a situation where you need to repot sooner to keep your orchid healthy.
Here are the most obvious signs that it’s time to repot your orchid:
- The growing medium has started to break down. When the bark in the growing medium gets too broken down, it can suffocate your orchid’s roots, which can damage and eventually kill your plant if this problem remains. At this point, your orchid needs to be repotted in fresh growing medium.
- The orchid is outgrowing its pot. If you see roots beginning to grow over the side of the pot, then it’s probably time to repot and move your orchid to a larger container. Orchids like to have their roots close together, but if the roots are suddenly moving out of the container, things have gotten too close.
- Your orchid hasn’t bloomed in several years. If your orchid hasn’t bloomed for a long time (and you haven’t repotted it during that time), then repotting with fresh soil may encourage your orchid to start blooming again.
If you notice these signs, repot right away as long as it’s between spring to fall and your orchid is not in bloom. If it’s winter or if your orchid is blooming, then wait to repot. The orchid should be able to make it until it stops blooming.
Time of Year to Repot an Orchid
Generally, the best time of year to repot a phalaenopsis orchid is during the spring, so it will be able to begin blooming once again in the summer or fall. The next best time to repot is during the fall; however, if you need to repot during the summer, you can repot then.
That being said, avoid repotting your orchid when it’s in bloom as this will stress your orchid and cause it to lose its flowers. Once your orchid has finished flowering, give it a couple of weeks to rest before repotting.
Potting Medium Recipe
Most orchids do not grow in the ground in their natural environment; instead, they tend to cling to trees in the areas where the branches meet the trunk. Orchids grown as houseplants should not be placed in regular potting mix because this doesn’t match their natural growing environment; they need a light-weight growing medium designed for orchids. You can either buy a commercial orchid potting mix or create your own potting mix.
How to create your own potting mix
Mix together three parts fir bark, one part perlite, and one part sphagnum moss to create an ideal growing medium for orchids.
Why is this kind of potting mix best for orchids? The bark is coarse, leaving plenty of room for air to circulate. The perlite absorbs water while also improving drainage. The sphagnum moss helps the mix hold on to water as well. It’s important for the growing medium to be able to store water because phalaenopsis don’t have too much water storage.
You may notice that orchids you buy sometimes only have sphagnum moss in their containers. This is because moss is lighter and cheaper to ship than the ideal orchid growing medium. For beginners, we recommend replacing the sphagnum moss with orchid growing mix instead because growing mix is easier to water correctly.
Select a Suitable Pot
When repotting, you only need to choose a new pot if your orchid appears to be outgrowing the previous pot. If using the same container, thoroughly wash the old pot before reusing it.
If you are choosing a new container, here’s what to look for:
First, the new container only needs to be slightly larger than the previous one. Look for a pot about 1 inch larger in diameter. Orchids do not do well in pots that are too large for them, so you don’t want to drastically change the size.
Second, you can either choose a plastic or clay pot for your orchid. Orchids will do well in either one, so it’s your preference. Plastic pots tend to be lighter and cheaper than clay and plastic pots also hold water better. On the other hand, clay pots are heavier, which helps balance out tall orchids and keeps them from tipping over. Clay also allows for air to circulate around the roots better, helping to prevent root rot.
Finally, make sure the new pot you choose has drainage holes at the bottom. Drainage holes are necessary to prevent excess water from suffocating your orchid’s roots. While pretty pots without drainage holes may be tempting, you risk overwatering and damaging your orchid.
If want to use a pot without drainage holes for decorative reasons, plant the orchid in a similar-sized plastic pot with drainage holes and then place the plastic pot inside the pretty one. Then you can remove the plastic pot to water the orchid and return it once the excess water has drained.
Phalaenopsis Orchid Repotting Step by Step
Step 1: Prepare the potting medium.
Whether you’ve chosen to follow the recipe above to make your own potting medium or bought a commercial orchid potting mix, you’ll need to soak the medium to allow it to take up moisture before you begin repotting your orchid. Otherwise, the dry bark may remove moisture from your orchid’s roots and dry out the orchid.
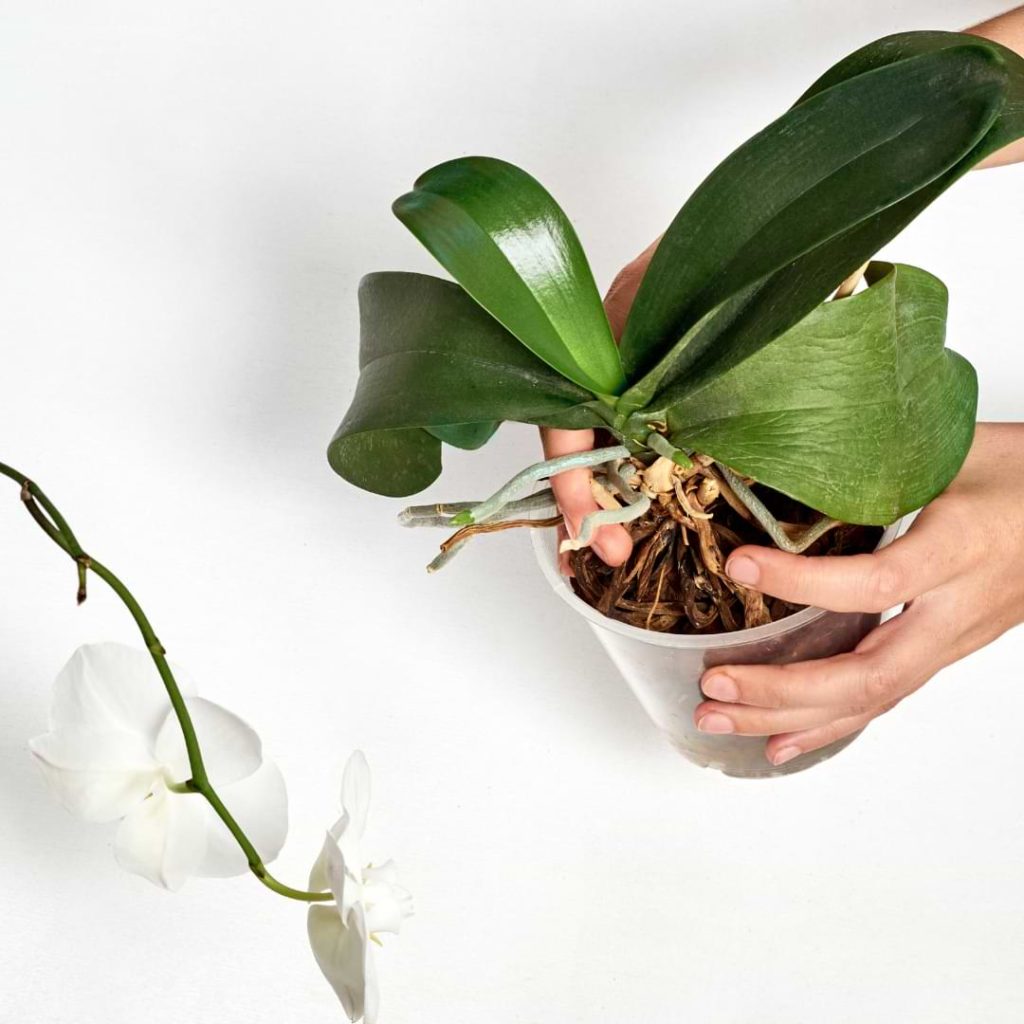
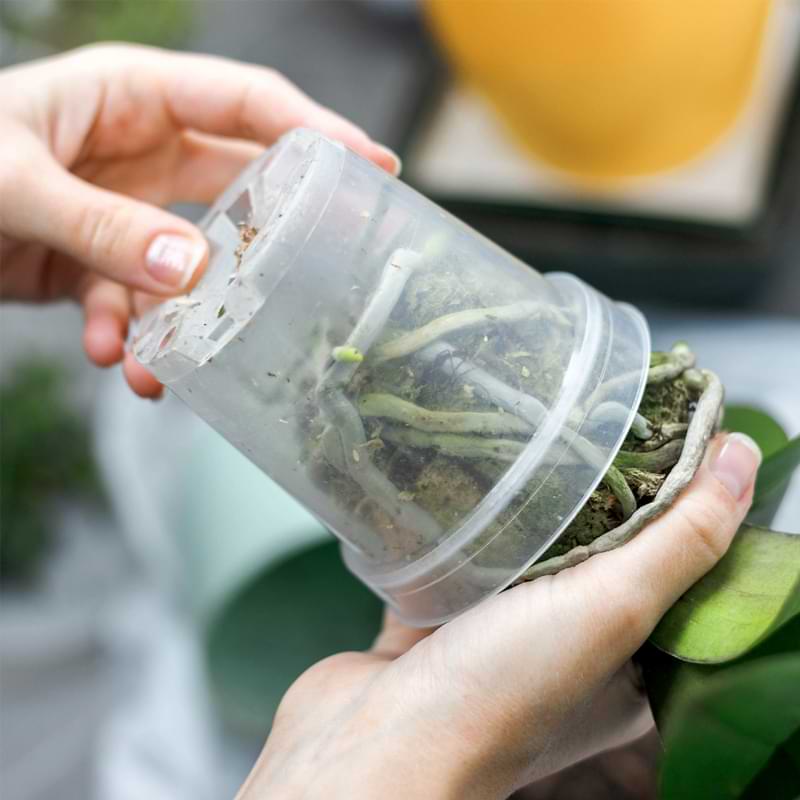
Step 2: Remove the orchid from its container.
Gently slide the orchid out of its original container. It may be easier to do this if you water the orchid beforehand. Clay pots can be especially temperamental about releasing plants while plastic pots tend to let the plants slide right out.
Step 3: Prepare the roots.
Carefully remove the old potting medium from the orchid’s roots and then inspect the roots. Using sterile scissors, cut away any dead or damaged roots. Healthy roots typically appear green or whitish-green, while damaged or dead roots are usually brown.
Step 4: Place the orchid in the container.
Mound the potting medium in the container. Your orchid’s roots are probably growing in a circle, so make a peak in the middle of the mound and gently place the roots around the peak. Place more potting medium around the roots. Shake the container a little to help the medium get into the holes between the roots. Just be sure not to pack the potting medium too densely and accidentally damage the roots.
Step 5: Continue caring for your orchid.
Place your orchid back in its normal location and continue caring for it as you normally would. Wait until two weeks after repotting to resume fertilizing. When you’re ready to begin fertilizing again, be sure to use a gentle fertilizer you can apply lightly.
Final Thoughts on Repotting Phalaenopsis Orchids
As you can see, repotting a phalaenopsis orchid is relatively easy. It’s important to repot at the right time, but otherwise, there’s nothing too tricky about the process.
Repotting does stress out your orchid, so don’t be surprised if it seems to take a little while to recover from the process. As long as the roots weren’t damaged during repotting, your orchid will be thriving again soon.
Repotting Phalaenopsis Orchids FAQ
Even though repotting phalaenopsis orchids is fairly easy, you may still have a few questions. After all, orchid care can be very different from caring for other houseplants.
FAQ: Do phalaenopsis orchids like to be root-bound?
Phalaenopsis orchids prefer for their roots to be closer together rather than spread out, so they do like to be a little root-bound. This actually allows them to absorb nutrients and water from the growing medium more easily. Just don’t let the roots get to the stage where they are tightly interlocked and difficult to separate.
FAQ: What do you soak orchid roots in before repotting?
Before you repot your orchids, you can choose to soak the roots in water. This makes them less brittle during the repotting process and a little less likely to get broken or damaged when you are moving everything around.
FAQ: Do orchids prefer bark or moss?
We recommend using an orchid growing medium that has both bark and moss in it. While orchids can survive just in moss, it’s easy to overwater them. Beginners should stick to a mix that includes both, but more experienced growers who are familiar with their orchid’s needs sometimes just use moss. If you decide to use only moss as your growing medium, allow the moss to completely dry out before watering.
FAQ: Can I use regular potting mix for orchids?
Regular potting mix is way too dense for orchids. Orchid roots need adequate air circulation, which regular potting mix doesn’t allow for. Either use a commercial potting mix designed for orchids or make your own growing medium.
Join Our Orchid Care Facebook Community
In our Facebook group of orchid lovers, we’re dedicated to creating a rich and engaging environment where plant lovers can come together and share tips, tricks, and experiences.
If you’re an orchid lover, come join our Facebook community! We can’t wait to celebrate your successes and help you troubleshoot your care routine.
For continued success, you can explore our other articles or visit our online shop for plant care products that are sure to keep your plants boasting rich green leaves and big, bountiful blooms year-round.