Are you tired of your once-beautiful orchids wilting away after blooming? Don’t give up on them just yet! Orchids can be encouraged to rebloom with the right care and attention. In this step-by-step guide, we’ll explore different types of orchids and their unique blooming schedules, as well as share tips for caring for your plant during dormancy. Additionally, it’s important to understand common issues that may prevent reblooming and how to overcome them. Get ready to bring new life to your beautiful orchids with our expert advice!
Understanding Your Orchids Blooming Schedule
Not all orchids bloom the same! It’s important to know what kind of orchid you have, and what their individual blooming schedule may look like in order to get your orchid to rebloom often and beautifully.
Phragmipedium
Phragmipedium orchids, also known as slipper orchids, are native to Central and South America. These unique plants require specific care to encourage blooming. Phragmipediums typically bloom in the late winter or early spring, with individual blooms lasting for several weeks. This genus typically blooms for 6-11 months at a time, and will produce blooms one after another when its conditions are ideal.
To understand your Phragmipedium’s blooming schedule even further, it’s important to identify its species. Some varieties of slipper orchids may have different blooming times than others. For example, the Phragmipedium kovachii is known for producing large flowers that can last up to three months!
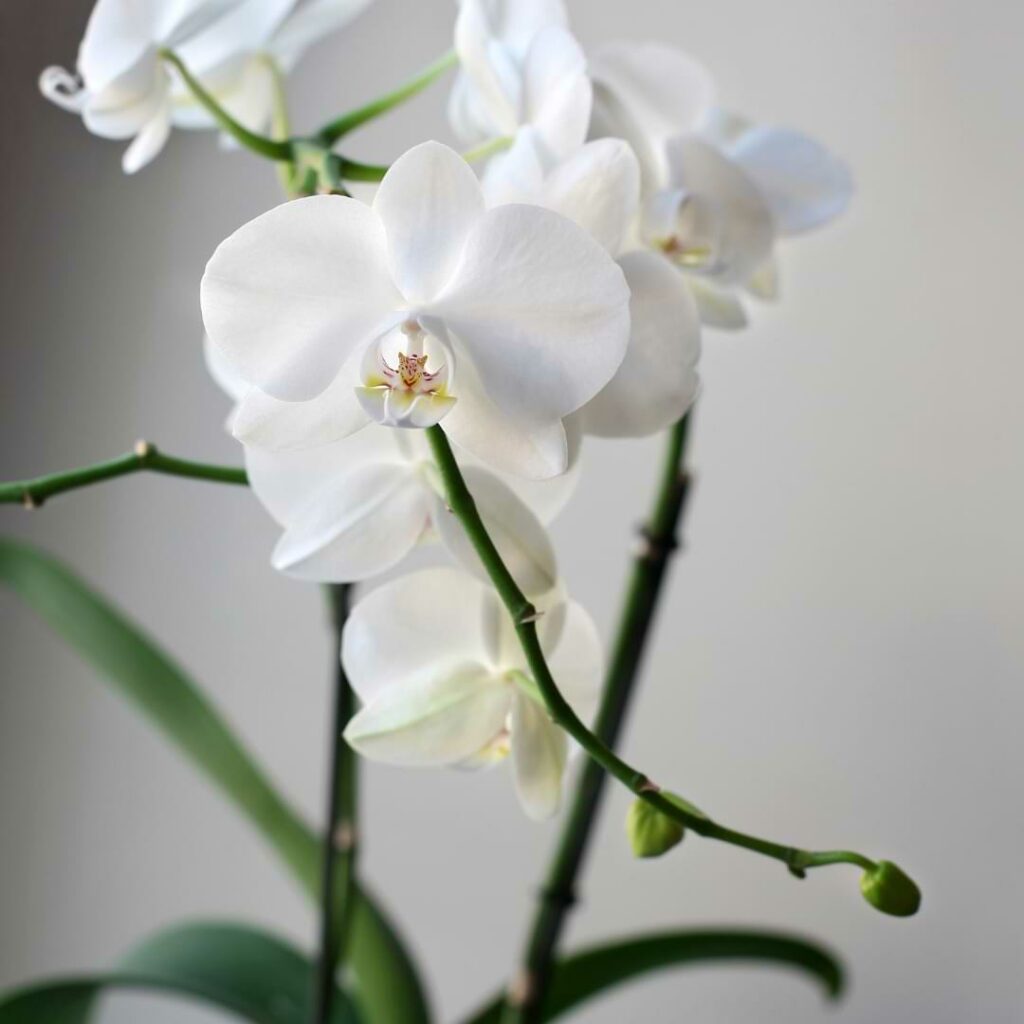
Phalaenopsis
Phalaenopsis orchids are one of the most popular types of orchids due to their ease of care and beautiful blooms.
Phalaenopsis orchids have a blooming schedule that varies depending on the specific plant. Typically, this type of orchid will go through a long period of growth followed by a dormant period before it’s able to rebloom. This process will typically take an entire year, so it’s common for this genus of orchid to only bloom once per year. But the blooms usually last 2-3 months!
During its growing season, which usually lasts from spring to summer, your Phalaenopsis may produce new leaves or aerial roots instead of flowers. However, with proper care and attention, it’s possible for your plant to produce multiple spikes throughout the year.
Vanda
Vanda orchids are one of the most popular orchids, and it’s mostly due to their flowering schedule. These orchids can bloom multiple times a year, and will go through their entire bloom cycle a few times per year. There are a few varieties of vanda orchids that like to stick to 1-2 bloom cycles per year, but for the most part, a vanda will give you beautiful blooms year round, with minimal breaks in between blooms. Their bloom schedule depends on the plant’s health and their environment, of course, but when all of the basics are taken care of, this plant will be happy to bloom consistently.
Dendrobium
The blooming schedule of dendrobiums can be divided into two categories: spring-blooming and fall-blooming. Spring-blooming dendrobiums usually begin to produce flower spikes in late winter or early spring and bloom through April or May. Fall-blooming dendrobiums typically start producing spikes in late summer or early fall with blooms lasting through October or November.
Some dendrobium orchids will only produce one set of flowers per year, and others will bloom twice in one year when given the proper care. It is important to note that not all types of Dendrobiums require a dormant period, so it’s vital to research your specific variety before assuming you need to provide them with one.

Step by Step Guide for Orchid Reblooming
Getting your orchids to rebloom can be a rewarding experience for any plant enthusiast. Here is a step-by-step guide to help you achieve success.
Wait for The Last Bloom to Fade
While it may be tempting to cut off wilting flowers immediately, doing so can actually harm the plant’s chances of producing new blooms.
When an orchid’s bloom fades, it begins to conserve energy and prepare for future growth. During this time, it’s crucial not to disturb or stress the plant with excessive pruning or repotting. Instead, wait until all the flowers on a spike have faded before cutting back any stems. This allows the orchid to redirect its resources towards growing new roots and leaves rather than repairing damaged tissues.
As you wait for your orchids to enter their dormancy phase, continue providing them with proper care such as adequate sunlight, water, and humidity levels. Be patient – some species may take weeks or even months before they’re ready to start growing again.
Remember that each type of orchid has its own unique blooming schedule and requirements; what works for one species may not work for another. By understanding your specific variety’s needs and following these steps closely, you’ll increase your chances of successfully encouraging reblooming in your beloved plants.
Remove Clips and Stakes
Once your orchid’s blooms have completely died off, it’s time to remove any clips and stakes that were used to support the blooms. These items can cause damage to the leaves or roots if left on for too long.
To begin, gently remove any clips or ties that are holding the spikes in place. Use scissors or garden shears to cut away any string or wire ties that cannot be easily removed by hand. Next, carefully remove any stakes from the potting mix. Be sure not to disturb the roots while doing so.
Remember, removing clips and stakes is an important step in encouraging your orchid to rebloom, even though it may seem a minute detail. It allows the plant room to grow without restriction and helps prevent damage that can hinder future growth.
Trim Spikes
(include what to do with green spikes, brown spikes, single and double spikes explaining the importance, where to cut, and reasons why
Once the last bloom has faded from your orchid, it’s time to trim the spikes. This step is essential for encouraging reblooming and keeping your orchid healthy.
Before trimming your orchid’s spikes, it’s a good idea to assess their health. This will give you an idea of where to cut them, and it will give you insight into your plant’s health. Regular orchid flower spikes are a medium-bright green color, and are firm when you hold them between two fingers. Yellowing or brown spikes are unhealthy flower spikes, and will likely take a lot of energy away from your plant without giving you any blooms.
On your orchid’s spikes, you’ll see small growth nodes, which is where new growth on your orchid comes from. To trim your spikes, whether there are one or two flower spikes on your orchid, you’ll want to assess the health of the whole spike. If the end of the spike is beginning to turn yellow or brown, you’ll know you need to trim below the affected area.
To start, use clean pruning shears or scissors to remove any dead flowers or buds that remain on the spike. Make sure to cut right above one of the nodes you identified earlier. Remember, if you see yellow or brown areas on a flower spike, you’ll want to cut below that part of the spike, just above the next lowest growth node.
If you’re not sure how much of the spike to trim, aim for about an inch above where it emerged from the plant. This will help stimulate new growth and prevent disease from spreading. After trimming, make sure to disinfect your tools with rubbing alcohol or bleach before using them again on another plant.
Remember: cutting back spikes may seem counterintuitive, but it’s crucial for promoting healthy reblooming in your orchids! It signals to the plant to put its energy into growing more above the soil, as opposed to growing more roots below the soil. Just remember that balance is crucial. Don’t think that just because you prune the flower spike that you’ll have unlimited orchid flowers. Root growth is just as important as flower spike growth for the health of your orchid.
Care During Dormancy
(cover feeding, watering, temperature, sun exposure, etc.. To keep orchids healthy whilst in dormancy)
During the dormant period, orchids require less water and nutrients than during their active growing season. However, it is still important to provide them with proper care to ensure that they rebloom successfully, and that they don’t lose too many nutrients while they are resting.
Watering During Dormancy
Watering during dormancy is crucial to ensure that your orchids remain healthy and ready for reblooming. During this phase, the plant’s water requirements decrease as it enters a state of rest. However, that doesn’t mean you can neglect watering your orchids altogether.
To determine when to water your dormant orchid, check the potting mix with a moisture meter or stick your finger into the soil about an inch deep. If it feels dry, then it’s time to give your plant some water. Be sure not to overwater as this can lead to root rot.
When watering, use room temperature water and avoid getting any on the leaves or crown of the plant as this can cause damage or encourage bacterial growth. It may be helpful to switch from bottom watering (where you let the pot sit in a tray of water) to top watering during dormancy so that you have better control over how much water is given.
Always monitor your orchids’ response after each watering and adjust accordingly if necessary. Remember that proper hydration is key for keeping them healthy during their resting period!

Fertilizing during Dormancy
Fertilizing your orchids during their dormancy period is an essential step in getting them to rebloom successfully. While they may not be actively growing, they still need a certain amount of nutrients to prepare for the next blooming cycle.
It’s recommended to fertilize once a month during the dormant period with half-strength fertilizer. Be sure not to over-fertilize as this can lead to damage or even death of your orchid. An easy way to avoid over-fertilizing is by using a specially formulated orchid food that is given every time you water your plant. It takes the guesswork out of feeding your orchid the right nutrients, and is much easier than remembering to fertilize on a regular schedule.
Regardless of the fertilizing method you choose, decrease your plant’s nutrient intake by half when the plant is dormant. By providing proper nutrition and care during dormancy, you’ll give your orchid everything it needs for successful reblooming in the future.
Move to a Cooler Location with Bright Sunlight
Moving your orchid to a cooler area while it is dormant simulates its natural environment getting colder when most tropical plants will enter dormancy for a short time. Mimicking this natural occurrence will signal to the orchid that when it experiences consistently warmer temperatures again, it’s time to rebloom.
Keep an eye on the temperature and humidity levels of your orchid’s location throughout the active growing phase and the dormancy period. Orchids prefer cooler temperatures between 60-75°F (15-24°C) during the day and slightly lower at night.
Maintain Humidity
Maintaining proper humidity levels is crucial for ensuring your orchids bloom again. Orchids require a specific range of humidity, which can vary depending on the species. In general, most orchids prefer a humidity level between 50-70%.
One simple way to increase humidity is by placing a humidity tray near your orchid or using a humidifier near where your orchid lives. This will help keep the surrounding air moist and reduce moisture loss from the plant’s leaves.
Another way to maintain consistent humidity is by grouping multiple plants together in one location. The plants will naturally release moisture into the air through transpiration, creating an ideal environment for reblooming. It’s also essential to avoid sudden changes in temperature or exposure to drafts as they can quickly dry out your plant and lower its overall health.
If you notice signs of low humidity such as shriveled leaves or dry potting mix, take action by increasing humidity levels immediately. A plant that’s stressed because it isn’t in the right environment will only focus on survival, not producing new blooms.
Repot if Necessary
Repotting an orchid doesn’t usually happen too often, typically about once every 2-3 years. It is necessary when you see the roots growing out of the pot or if the soil has broken down, though. This process can be done during its dormant phase, which as we’ve learned is typically right after a bloom fades.
The first step in repotting your orchid is to gently remove it from its current pot. Make sure to knock off as much old soil as possible without hurting the roots. Using a clean pair of pruning shears, trim any dead or decaying roots. If there’s any sign of disease or pests, treat them before putting your plant into a new pot.
When choosing a new pot for your orchid, make sure that it’s only slightly bigger than its previous one and with good drainage holes at the bottom. Orchids prefer being root-bound as they grow best in small spaces, so giving it too big of a pot will have a negative effect on your orchid’s overall health.
After placing some fresh bark-based media inside the new container, position your plant so that its base rests just above the medium surface level and fill up around it with more media until all gaps are covered. Orchids will not do well in regular potting soil, so make sure the soil you choose is orchid-specific. Water thoroughly but allow excess water to drain away from under the pot before returning it back to where it was previously located.
Waiting for New Flower Spikes
After the dormancy period, your orchid is ready to start growing again. You may be eager to see new flower spikes on your plant, but it’s important to remember that orchids grow at their own pace. It can take several months for a new spike to emerge.
During this time, continue providing your orchid with proper care: keep it in a cool location with bright sunlight and maintain humidity levels around 50%. Water when the top layer of soil feels dry and fertilize once a month using a balanced fertilizer, or with an every-day plant food to ensure it’s getting smaller doses of the nutrients it needs.
Be patient and resist the urge to over-care for your orchid, as too much attention can actually delay blooming. Instead, check in on its progress regularly without disturbing the roots or newly emerging leaves.
When to Move to a Warmer Location
Typically, you’ll want to wait until you see new growth on your orchid before moving it back to a warmer location. This can indicate that the plant is ready for more warmth and will be able to handle it without any damage. Another factor that can influence when you should move your orchid back into a warm space is climate. If you live in an area with mild winters and your orchid lives outside, you may not need to worry as much about keeping your plants warm during cold spells.
If the plant lives inside year-round, aim to move it back to its spot in indirect sunlight when you see new growth above the soil. Paying attention to your specific type of orchid and monitoring its growth patterns can help guide when it’s time to move it back into a warm location for optimal blooming conditions.
Common Reblooming Issues
While orchids are a beautiful and exotic addition to any home, they can be finicky when it comes to reblooming. Orchid owners may encounter issues that prevent their plant from producing new flower spikes. Here are a few of the more common issues you may encounter when waiting for your beautiful orchid to rebloom.
Climate
Maintaining the right climate for your orchid will be the best defense against blooming issues with your plant. The most common reason orchids fail to bloom again is because their environment is not ideal, and the plant is likely spending all of its energy focused on staying alive, not on blooming. Fixing an orchid’s environment and the climate around it will likely fix most blooming problems.
Age of Orchid
The age of an orchid can be a factor in its ability to rebloom successfully. Generally, younger orchids tend to bloom more frequently than older ones. This is especially true for certain species such as the Phalaenopsis.
As an orchid ages, it may require more time between blooming periods and may produce fewer flowers each time it blooms. However, there are ways to encourage an older orchid to rebloom, such as proper care during dormancy and providing adequate light and humidity.
In general, age can play a role in how often an orchid blooms. With proper care, even older plants can continue to bring beauty into your home or garden.
Pest Infestations
Keeping your orchids healthy and free from pests is crucial for successful reblooming. Some common pests that can affect orchids include spider mites, mealybugs, and scale insects. If you notice any signs of infestation, such as webbing or tiny bugs on the leaves or roots of your plant, take immediate action.
There are several ways to treat pest infestations on orchids, including using insecticidal soap or neem oil. It’s essential to follow the instructions carefully when applying these treatments to avoid damaging your plants.
In summary, getting an orchid to rebloom requires patience and careful attention to its needs. By following the step-by-step guide outlined in this article and addressing any issues that may arise along the way, you’ll be well on your way to enjoying beautiful blooms year after year. With a little TLC and some know-how, anyone can become an expert at growing healthy and vibrant orchids!
More Orchid Resources
For continued success and more secrets to a healthy orchid, explore our other articles, visit our online shop, and connect with other orchid plant lovers in our Facebook group. There you’ll find everything you need to know to grow your orchid garden big and strong so you can enjoy your plants for years to come.