Follow these simple steps to repot your orchid without damaging your plant in the process.
Like all houseplants, orchids eventually outgrow their pots—especially if they’re young plants growing quickly!
You’ll know it’s time to repot your orchid when you notice white roots growing over the lip of your plant’s container, or when you notice the potting material is no longer draining properly.
When you decide it’s time to repot your orchid, wait until it finishes flowering and you notice new growth. This is the ideal time to give your orchid a new pot with more room to grow and fresh potting mix.
Below, we walk you through the 7 steps to safely repot your orchid, without killing it or damaging your plant in the process.
Step 1: Prep your workstation.
Before you begin repotting your orchid, make sure your workstation is stocked with the equipment you need to get the job done. This will prevent you from running into snags along the way, and it’ll help you get your plant out of its old pot and into its new one quickly.
For best results, have these tools and accessories available at your workstation:
- A new orchid pot
- Well-draining orchid growing mix
- A reliable pair of sharp shears
- A root supplement to encourage new, healthy roots
- Premium Orchid Food to nourish your new plant once it’s repotted
Professional Tip: Orchids can be susceptible to disease, so be sure to sterilize your tools before getting started.
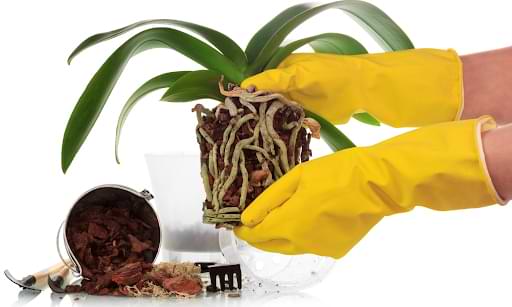
Step 2: Remove your orchid from its current pot.
The key to removing your orchid from its current pot is to do so gently. For best success, hold the plant firmly by the base of its stem and loosen the roots free. Patience is key here. Avoid applying too much pressure to the plant to avoid breaking its stems accidentally.
Professional Tip: If your orchid doesn’t pop out of its container easily, use a spoon or sterile tool to help release it.
Step 3: Trim away dead roots.
Once the orchid is removed from its original pot, gently untangle the clump of roots with your fingers and inspect the roots. If you notice any rotten, mushy, or damaged roots, remove them with a clean, sterile pair of shears.
Professional Tip: Loosening your orchid’s roots and trimming them before repotting your plant encourages your plant to take to its new potting mix quickly.
Step 4: Place the orchid in its new pot.
After you’ve cleaned up your orchid’s roots and trimmed off the dead roots, it’s time to place your orchid in its new pot. In general, an orchid pot should have plenty of drainage holes, allow air to reach the orchid’s roots, and shouldn’t be too big.
Though it’s not a necessity, choosing a transparent orchid pot is beneficial. Most orchids have complex root systems that enjoy having access to sunlight and air.
Place your orchid in the pot so that its new growth is level with the top of the pot.
Professional Tip: For more information on how to choose the perfect pot for your orchid, check out our article “The Ultimate Guide to Buying the Right Orchid Pot.”
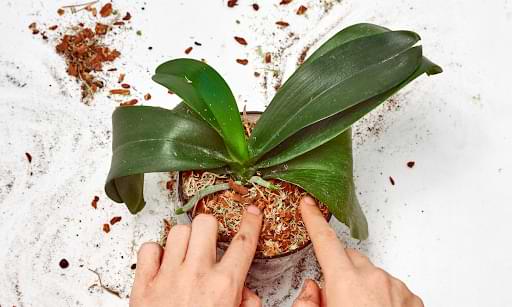
Step 5: Fill the new pot with potting mix.
Depending on its species, your orchid may need a specific potting mix to thrive. It’s important to keep in mind that not all orchids grow in dirt. In tropical climates, orchids grow clinging to the bark on trees. So using thick dirt or traditional soil can suffocate your orchid’s delicate root systems rather quickly.
Be sure to purchase a potting mix formulated for your orchid species. If you’re on a budget or looking for a hands-on project, you can create your own orchid potting mix by combining peat moss, tree bark, and perlite.
When you’re ready to fill in your orchid’s pot with potting mix, hold the plant securely in the middle of the pot and fill in the gaps with new mix. For best results, wet the mix lightly with distilled water so that it is damp to the touch but not soaked through. This will make it easier to handle.
Professional Tip: Add potting medium a little at a time, using your fingers or a chopstick to settle it around the roots. Continue adding potting mix until you reach the top of the pot.
Step 6: Stake your orchid.
Stakes are an important part of keeping your orchid happy and healthy. Without them, your plant’s primary stems may bend and break under the weight of new blooms.
To stake your orchid, insert a stake carefully into the potting medium and use clips or ties to secure the spike every few inches.
Professional Tip: When clipping your orchid’s spike to its stake, avoid nodes and place your last clip 1-2 inches below the first bud.
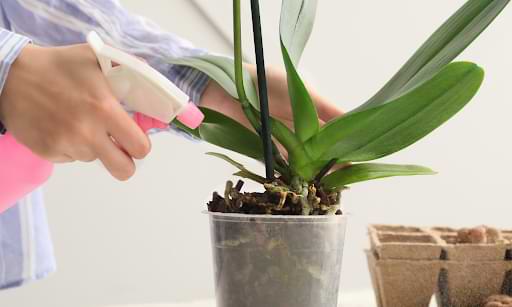
Step 7: Fertilize your orchid.
Once your orchid is secure in its new pot, be sure to give it a good drink and position it in a spot where it’ll have plenty of access to indirect sunlight.
To ensure your orchid stays healthy year-round and boasts big, bountiful blooms during flowering season, be sure to use an orchid fertilizer. Our Premium Orchid Food formula is gentle so it won’t harm your orchid or terrarium plants, and it’s liquid, which is an optimal delivery method for orchids since it’s easily absorbed.
Professional Tip: Using Premium Orchid Food is easy. Simply add the fertilizer to your watering routine and care for your plants as usual. Then enjoy your terrarium and its blooms. Simple as that.
A Recap: How to Repot Your Orchid
With these 7 easy steps, you’ll have your orchid in its new pot in no time. Here’s a quick recap so you can get started repotting your plant today.
- Prepare your workstation.
- Remove your orchid from its current pot.
- Trim away dead roots.
- Place your orchid into its new pot.
- Fill the new pot with potting mix.
- Stake your orchid.
- Fertilize your orchid.
To dial in your success, join our Facebook community of orchid lovers so we can cheer you on. Pop into the group to connect with other orchid growers, ask questions, and share photos of your orchid-growing journey.