Vanda orchids are some of the most beautiful and captivating flowers in nature. They come in a variety of bright colors and sizes, making them a great addition to any garden or home. But caring for and growing Vanda orchids can be quite tricky, so we have put together this guide to help you along your journey. By properly taking care of your Vanda Orchid, you can continue to enjoy this plant for years to come.
Growing Vanda Orchids
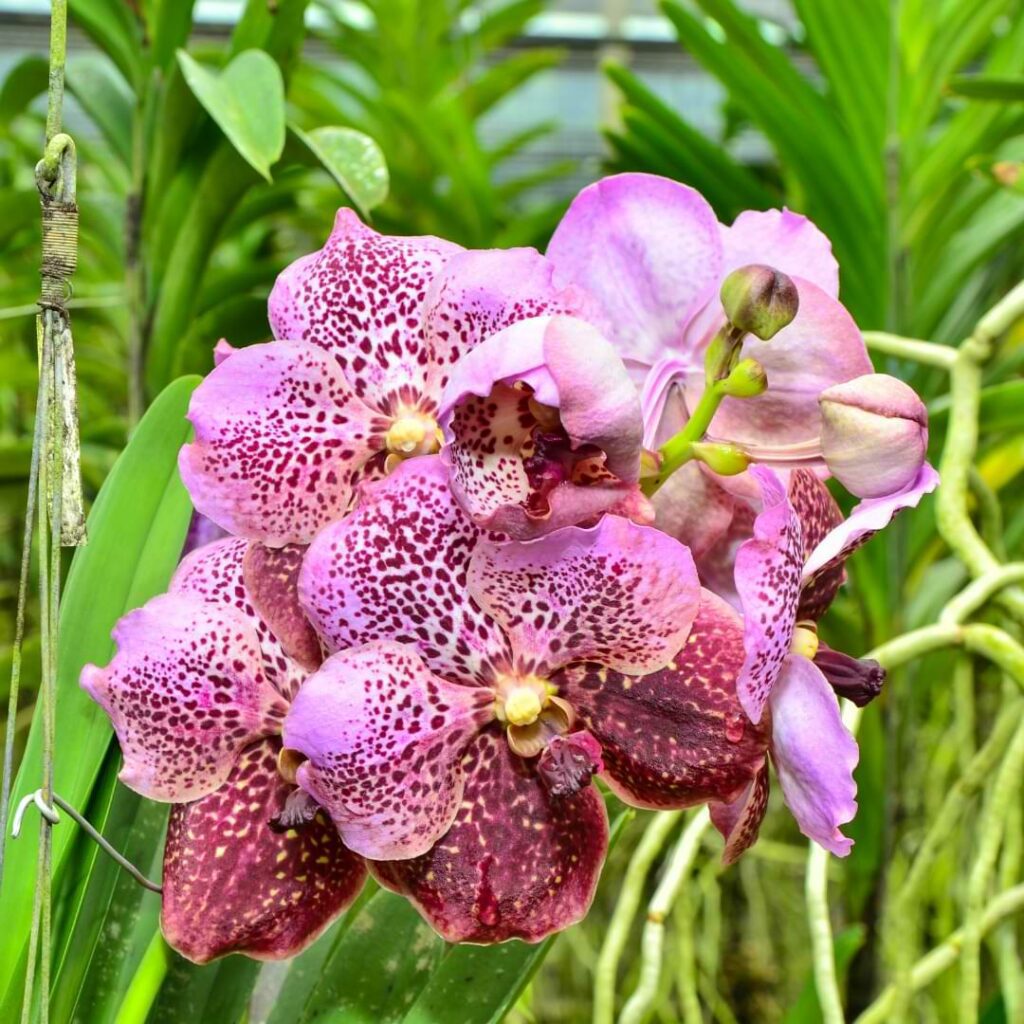
Vanda orchids are a type of epiphytic orchid that originates from tropical and subtropical regions of Asia. They are available in a wide range of colors, including white, yellow, pink, red, and purple. Vanda orchids typically have large, flat leaves and long-lasting flowers.
Vanda orchids are most commonly grown in pots, as many areas do not have the right temperature year-round to grow this orchid directly in the ground.
With proper care, vanda orchids can bloom multiple times throughout the year. Flowering typically lasts for four to six weeks per bloom cycle. Once flowers start to fade, the bloom should be removed from the plant to encourage further blooming.
Stages of Growth
There are several stages of growth for vanda orchids: the vegetative stage, the flowering stage, the post-flowering stage, and the dormant stage.
Germination
You will likely get your vanda orchid after it has germinated and grown significantly, but most plants start from a seed or bulb that needs to germinate. Once your orchid has germinated, it is considered a seedling.
Seedling Stage
The seedling stage can last for quite some time with Vanda orchids. In one year, your orchid will only be about an inch tall, so you’ll have to have patience-and a lot of it- if you are growing a vanda orchid in the seedling stage. After about a year, it can be considered a young plant.
Young Plant Stage
In this stage, the Vanda Orchid will do a lot of its growing and maturing. This stage lasts 4-6 years after the seedling stage, and you can expect about 1-2 inches of growth each year. You will likely not see any flower spikes at this stage.
Keep an eye on the leaf pattern in this stage, because the leaves will tell you a lot about the plant’s overall health. Each new set of leaves will grow just slightly longer than the previous set of leaves, and they will always grow from the crown of the plant. If the Vanda’s new leaves are shorter than the ones below it, it could mean that the plant is stressed in some way.
Flowering Stage
This is one of the most exciting phases in the Vanda Orchid’s life cycle, and not only because it takes so long to get to this point. When the Vanda Orchid flowers, it will send out a flower spike from between two sets of leaves, usually only on one side of the plant. This spike will grow four to seven flowers, and they will last about a month or more before they begin to die back.
A thriving Vanda Orchid could flower up to 4 times per year, giving you multiple chances to enjoy their beautiful flowers, and the new flower spikes will always appear above the previous one.
Post-Flowering
After flowering, the flowers will die back and fall off of the plant, and then the flower spike will dry up, at which point you can simply prune it off. At this point, the Vanda will put all of its energy into either growing taller or growing another flower spike, and this cycle will continue until the plant eventually dies. Vanda Orchids can live quite some time, even upwards of 15-20 years.
“Dormant” Stage
The Vanda Orchid doesn’t actually go dormant, as long as its needs are being met. This plant will actually change where it sends its energy depending on where in the flowering cycle it is, along with the orchid’s environment, including temperature and amount of daylight. What many people consider the Vanda’s “dormant” stage is actually when the flower is simply focusing its energy on creating new roots, or the plant does not have enough nutrients to grow as quickly as before.
Improving Your Orchid Blooms
Luckily, Vanda Orchids are fairly forgiving with their blooms. So even if your orchid has had some trouble in the past with its blooms, as long as their needs are being met they will give you beautiful blooms next time around. Here are some tips so you can get those beautiful blooms the next time your plant is ready to bloom.
- Make sure your plant is getting enough light. Orchids need bright, filtered light in order to bloom well. If your plant isn’t getting enough light, it may not bloom at all, or the blooms may be small and lackluster.
- Fertilize regularly. Orchids need nutrients to produce beautiful blooms, so be sure to fertilize your plant every month or so. Use a specially formulated orchid fertilizer for best results.
- Monitor the humidity level around your orchid. This will tell you if you need to increase or decrease the humidity to give your orchid the best conditions possible.
- Deadhead spent blossoms. This means removing any flowers that have already withered and died. Doing this will encourage your plant to produce more flowers.
By following these simple tips, you can help ensure that your orchid produces beautiful blooms all season long!
Epiphytic Plant Needs
Epiphytic plants are different from typical houseplants. They typically grow on another plant in their natural habitat, so their needs are going to be different than a regular plant. Epiphytic plants get some of their nutrients from the air, whereas most houseplants only get nutrients from the soil they are planted in.
Epiphytes typically need less water and fertilizer than other house plants. They also need a well-drained potting mix that is high in organic matter. As a matter of fact, Vanda Orchids are happiest with a very chunky soil mix that gives their roots plenty of room and air flow. Most epiphytes do best in bright, indirect light.
Common Problems
Vanda orchids are susceptible to a number of problems, including pests, diseases, leaf problems, flower problems, and more.
Pests And Diseases
Pests and diseases are common problems when growing orchids. Aphids, mealybugs, slugs, and snails are some of the most common pests. Orchids can also be susceptible to fungal diseases such as root rot and leaf spot.
Preventing pests and diseases is the best way to keep your orchid healthy. Start by using sterile potting mix and tools. Be sure to quarantine new plants before adding them to your collection. Inspect your plants regularly for signs of pests or disease. If you do find a problem, isolate the affected plant and treat it accordingly. You may have to treat with neem oil to ensure any infestation is taken care of quickly before it does significant damage to your plant.
Shrivelled Leaves
Shrivelled leaves on orchids can be caused by a number of different factors, including:
- Too much or too little water
- Not enough light
- Too much heat or cold
- Nutrient deficiencies
If you notice your orchid’s leaves start to shrivel, it’s important to take a closer look at the plant and try to determine what might be causing the problem. Once you’ve identified the issue, you can take steps to correct it and prevent further leaf damage.
Other problems that may affect your Vanda Orchid are flowers that shrivel up shortly after blooming, root rot, or leaf spot. These issues are typically caused by nutrient deficiencies, not having enough air circulation, or watering too often.

Caring For Vanda Orchids
Vanda orchids have some specific needs that are unique from other types of orchids, but don’t worry! We will cover everything from the soil it needs to how to repot your Vanda.
Growing Media
One of the most important aspects of vanda orchid care is choosing the right growing medium. While these plants can grow in a variety of media, they prefer a well-draining mix that contains plenty of organic matter. Some growers recommend using a mixture of sphagnum moss, perlite, and charcoal, while others swear by coco coir or tree fern fiber. Whichever medium you choose, make sure it is loose and airy to ensure good drainage and aeration.
Light and Position
More light is almost always better for the Vanda Orchid. These plants are native to tropical environments where they receive dappled sunlight throughout the day. In a house, this can be replicated by placing them near a bright window where they will receive indirect sunlight for a good portion of the day. If you don’t have a bright spot in your home, you can supplement with grow lights to give your orchid the light it needs to thrive.
When it comes to positioning your orchid, remember that these plants like to be in humid environments. You can create a mini greenhouse for your orchid by placing it on a pebble tray filled with water, or simply misting it regularly. Just be sure not to overwater – orchids are susceptible to root rot if they sit in water for too long.
Temperature and Humidity
Temperature and humidity are critical to growing healthy vanda orchids. The ideal temperature for these plants is 70-85 degrees Fahrenheit during the day, and 60-70 degrees at night. They also prefer high humidity, around 60-80%. If your home isn’t naturally this humid, you can create a humid environment for your plant by placing it on a pebble tray filled with water or using a humidifier.
Watering
Watering your Vanda orchid is one of the most important aspects of proper care. These plants are native to tropical and subtropical regions and prefer high humidity. They also like their roots to be constantly moist, but not soggy. Depending on the potting mix you use, you may need to water your Vanda more or less frequently. A good rule of thumb is to water when the potting mix is dry to the touch.
When watering your Vanda, be sure to use lukewarm water. Cold water can shock the plant and damage the roots. Use a watering can with a long spout, or a hose with a gentle setting, so that you don’t disturb the delicate root system. Allow the water to run through until it drains out the bottom of the pot.
Once your Vanda has been watered, it’s important to empty any water that has collected in the saucer beneath the pot. This is because standing water can lead to root rot, which can be fatal for your plant.
Fertilizing
Fertilizing orchids is important to maintain the Vanda’s health and vigor. For this plant, it is highly recommended to use a fertilizer that is specific for orchids. This is because Vanda Orchids are a bit more sensitive than other orchids, but also because it’s just good practice to find a fertilizer or plant food that was tailored to the specific plant you’re giving it to.
A plant food can give your Vanda the best chance to absorb nutrients. To use this Orchid Plant Food Spray, you simply spray your plant on watering day and water your plant normally, following your regular watering schedule.
Re-Potting
If your orchid is looking a bit cramped in its pot, it might be time for a re-pot. A general rule of thumb is to re-pot every 1.5-2 years, or when the roots start to peek out of the drainage holes.
Before you get started, gather everything you’ll need: fresh potting mix, a clean pot ( make sure it has drainage holes!), pruning shears, and some sort of plant ties or tape. You’ll also want to have a bucket or bowl of water nearby.
Start by gently removing your orchid from its current pot. Once it’s out, take a look at the root system – if it’s tangled or matted, now is a good time to untangle and trim any problem areas. If everything looks healthy, you can go ahead and start repotting.
To begin, add an inch or two of fresh potting mix to the bottom of the new pot. Next, place your orchid in the pot and begin adding more mix around it, firming as you go. Once the plant is secure, water it well and give it a few days to adjust to its new home before moving on to regular watering and care routines.
Flowers
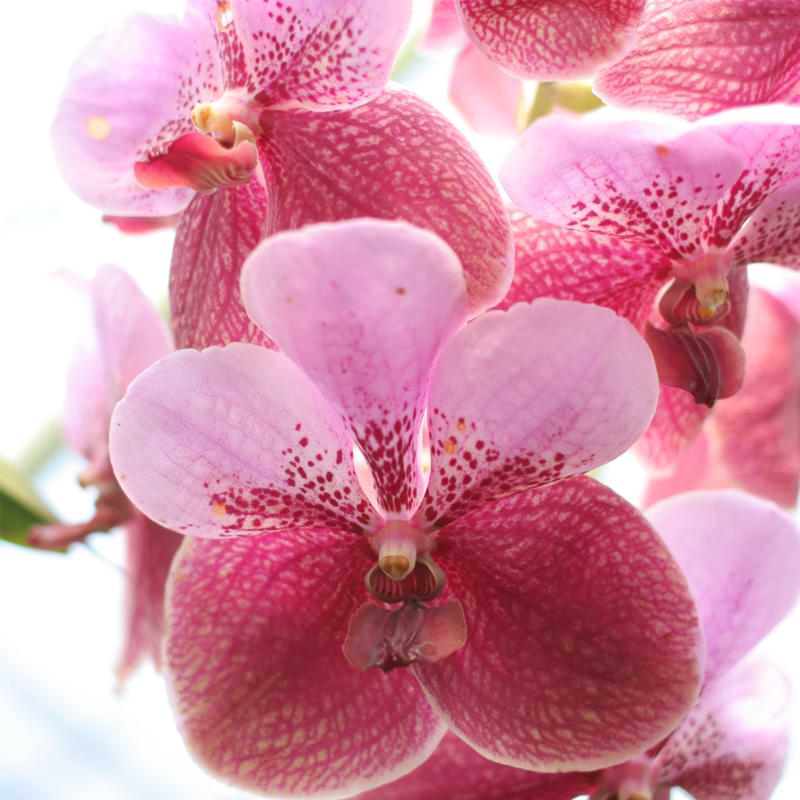
Vandas generally have large, showy flowers that bloom continuously throughout the plant’s life. The Vanda is a pretty unique Orchid, as was mentioned above, because it will bloom multiple times per year as opposed to only once per year like other orchids.
A Vanda Orchid will grow a flower spike first, and then will grow anywhere from four to seven flowers on one spike. During this phase of the plant’s life cycle, it may need more fertilizer to ensure the blooms stay strong and beautiful. After the flowers die off, usually about a month or more after emerging, you can safely trim the flower spike as close to the main stem as possible.
Pruning
Pruning is an important part of vanda orchid care. Pruning helps to keep the plant healthy and encourages new growth. When pruning, be sure to remove any dead or dying leaves, flowers, or stems. It’s important not to prune the plant from the top, as this is where all the new growth comes from. This plant will not offshoot two stems from one cut like many other house plants will.
Vanda Orchid pruning should be kept to a minimum when possible, but when you do prune your Vanda, only prune the dead, dying, or diseased leaves, and prune off any spent flower spikes.
Propagating Vanda Orchids
To propagate a Vanda orchid, start by carefully removing a healthy pseudobulb from the parent plant. It’s best to wait until the pseudobulb is at least an inch tall before removing it from the parent plant. This will ensure it has a fighting chance when removed from the parent plant.
Place the pseudobulb in a pot filled with moist potting mix, and cover the pots with clear plastic wrap. Place the pots in a warm, bright location out of direct sunlight. After about six weeks, you should see new growth starting to appear on the pseudobulbs. Remember to have patience! This plant takes its sweet time growing, but it is so worth the wait!
FAQ Caring For Vanda Orchids
Where do Vanda orchids grow best?
Vanda orchids are native to tropical and subtropical areas of Asia, so they grow best in warm, humid conditions. They can be grown outdoors in these climates, but they will also do well indoors if you can provide them with the right conditions.
Final Thoughts: Vanda Orchids Care
If you want to add a touch of elegance and refinement to your home, then consider growing some Vanda Orchids. These beautiful flowers can be a bit more difficult to care for, but with a little bit of effort, you can enjoy their beautiful blooms year-round.
If you’re an orchid lover, come join our Facebook community! We can’t wait to celebrate your successes and help you troubleshoot your care routine.
For continued success, you can explore our other articles or visit our online shop for plant care products that are sure to keep your plants boasting rich green leaves and big, bountiful blooms year-round.