Learn how to revive a dead orchid with these 5 easy-to-implement steps.
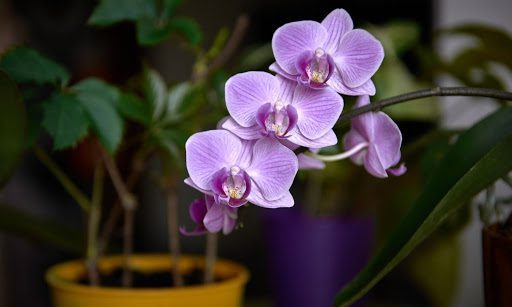
When your tropical orchid is happy and healthy, it’s showstopping. It boasts beautiful blooms and thick green foliage, and it often serves as a spectacular indoor garden centerpiece. But when your orchid is under stress, it can quickly lose its stunning qualities and appear shriveled, yellow, or unwell.
A sudden change in your orchid’s appearance may be alarming. And it may leave you wondering if it’s too late to save your favorite indoor plant.
The good news is that if you act quickly, a wilting orchid is absolutely salvageable. Let’s take a deeper look at how you can revive a dead orchid and bring it back to life so you can get back to enjoying its unparalleled beauty.
Step 1: Move Your Orchid to a New Pot
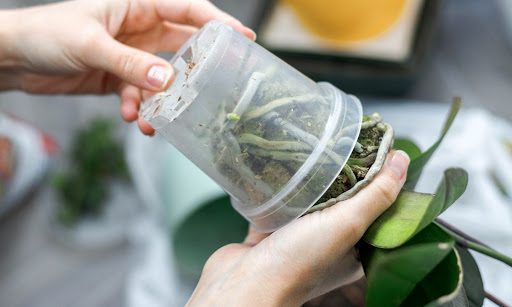
Orchids that sit in damp or highly decomposed potting mix can easily suffer from root rot. So the first step in reviving your wilting orchid is to move it to a new pot. This will help your orchid’s roots dry out and heal if they’re damaged.
When you’re repotting your orchid, use your fingers to loosen the plant from its original pot, and be sure to loosen the roots a bit to get rid of any potting mix that’s stuck to the root system. Trim back
mushy or potentially rotten roots to encourage new, healthier root shoots to grow in their place.
Choose a new orchid pot with plenty of drainage holes to ensure your orchid’s roots have access to air and sunlight—two things they need to remain happy and healthy.
It’s also important to choose a pot that’s just large enough for the orchid’s roots to fit snuggly. If the pot is too big, the roots will suffocate under the weight of the excess potting mix. On the other hand, if the pot is too small, your orchid will become root-bound and need another new home quickly.
Professional Tip: If your orchid’s roots are growing over the pot’s edge or protruding from the pot’s drainage holes, it’s a clear sign your plant needs a new, larger pot.
Step 2: Give Your Orchid Fresh Potting Mix
The second step to reviving your orchid is to give it fresh potting mix. Without proper nutrients, your plant won’t be able to support healthy blooms or leaves, so it’s important to refresh your orchid’s potting mix about once a year.
If you have a tropical orchid, be sure to use a potting mix specially designed for epiphytic plants. Because of their unique root systems, tropical orchids require a well-draining, loose organic potting mix rather than traditional soil. If you use regular soil or opt for what you have handy in the garden shed, you’ll likely kill your plant.
Professional Tip: For best results, place your orchid on top of a humidity tray after you’ve repotted it and refreshed its potting mix. A humidity tray will help ensure your orchid stays adequately hydrated as it basks in the moist air.
Step 3: Cut Back Your Orchid’s Stems
The third step to revive your orchid is to encourage new growth by pruning your plant. Keep in mind that you should always cut back flower stems once your orchid’s blooms have dropped. Do not cut back stems that are actively flowering since it’ll disrupt the blooming process and could result in plant-shock.
For best results, use a pair of sharp, sterilized shears to trim back your orchid’s stem so you don’t accidentally introduce germs or disease during the trimming process. Wearing a pair of garden gloves is advised too, to keep the process clean and tidy.
To prune your orchid, cut back weak spikes while leaving healthy ones intact. Generally, it’s wise to trim back spikes that are brown or yellowing. Cut the stalk about ¼ inch above a growth node to encourage the orchid to quickly flower again.
Professional Tip: Some orchids are single-spiked and others are double-spiked. Research your orchid type before beginning the pruning process so you don’t accidentally trim away necessary parts of your plant.
Step 4: Place Your Orchid in a South-Facing Room
Inconsistent and inadequate light conditions can greatly affect the health of your plant. If your orchid is showing signs of distress, you’ll want to investigate the light conditions necessary for your orchid species to ensure it’s getting enough sun.
Though orchid light requirements vary by orchid type, most tropical orchids thrive in indirect sunlight. For best results, place your orchid in a south-facing room. To avoid accidentally exposing your orchid to too much sun, put a sheer curtain between the orchid and its light source to diffuse direct sun rays.
Avoid placing your orchid outdoors unless your yard provides dappled sunlight and humid conditions. Orchids that grow in tropical environments may not do well in direct sunlight, dry climates, or extreme weather conditions.
Professional Tip: Keep in mind that a healthy plant will have strong, light- or medium-green leaves. Orchids with deep-green leaves are likely in need of more light. Orchids with bleached or reddish leaves are likely receiving too much light.
Step 5: Use a Gentle Orchid Fertilizer
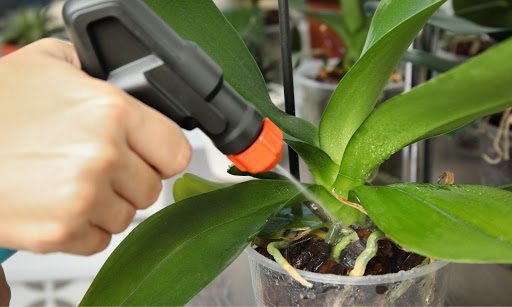
The last step to reviving your orchid is to apply a gentle, easy-to-use orchid fertilizer to give your plant a boost of vital nutrients. Your plant will thrive with a fertilizer that provides nitrogen, phosphorus, and potassium, though too much of any one nutrient can overwhelm your plant.
The best orchid fertilizer will have a gentle, well-balanced formula so it doesn’t burn your orchid’s roots or damage your plant from the inside.
Houseplant Resource Center’s Premium Orchid Food lets you grow beautiful, exotic orchids with ease. This product checks all the boxes. It’s gentle, easy to apply, and won’t burn your orchid’s roots.
Professional Tip: For best results, simply use Premium Orchid Food every time you water. Then sit back and watch your plant come back to life.
A Recap: How to Revive Your Dying Orchid
There you have it! You’ve learned how to revive a dead orchid with 5 simple steps.
Here’s a recap of the essential steps to get your orchid back to boasting its showstopping blooms:
- Step 1: Repot your orchid to allow for root aeration.
- Step 2: Give your orchid fresh, well-draining potting mix specifically designed for tropical plants.
- Step 3: Cut back your orchid’s stems with a pair of sharp shears to encourage new growth.
- Step 4: Place your orchid in a bright south-facing window so it has access to plenty of indirect sunlight.
- Step 5: Apply Premium Orchid Food to give your plant a boost of vital nutrients so it’s primed to grow big blooms and thick green leaves.
To learn more about how to care for your orchid, check out our other recent articles or visit our online shop to stock up on supplies to ensure your orchid-growing success.